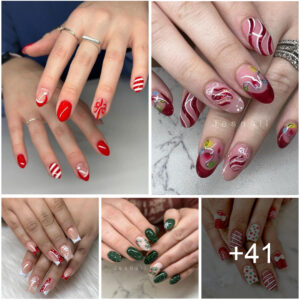
¿Las uñas prensadas son seguras para tus uñas reales? Aquí está la verdad.
Las uñas prensadas son un excelente tipo de mejora de las uñas. Hay muchos estilos, formas y patrones diferentes, son de fácil acceso y son una opción mucho más económica que otros tipos de manicura. Sin embargo, muchos tienen una pregunta cuando se trata de presionar: ¿Es seguro presionar las uñas?
Sí, las de prensa son seguras para las uñas naturales ya que solo requieren una pequeña cantidad de pegamento; No es necesario aplicar muchos productos diferentes como lo hace con otros tipos de mejoras para las uñas. También son un tipo de mejora de uñas mucho menos permanente, por lo que no las debilitarán por tenerlas puestas durante demasiado tiempo.
En esta publicación, compartiré toda la información que necesitas para saber por qué las uñas prensadas son seguras. También compartiré una guía paso a paso sobre cómo aplicar uñas postizas y métodos para quitarlas, de forma segura y sin dañar las uñas naturales.
¿Qué son las uñas a presión?
Las uñas prensadas son similares a las uñas acrílicas, pero son una opción menos permanente y requieren menos aplicación. Están fabricados a partir de material de resina acrílica, por lo que dan un resultado muy similar al que darían los acrílicos; Si obtiene una prensa de alta calidad y los aplica correctamente, podrían verse tan bien como los acrílicos a una fracción del precio.
¿Son seguras las uñas a presión?
Yes, press-on nails are safe. They are a great option for those that don’t want to ruin their natural nails and are looking for a short fix. Press ons only use a small amount of glue and require a little bit of filing to your natural nails to ensure they have a stronghold; due to this, they are much easier on your natural nails, and if everything is done right, they won’t damage your nails.
Compared to acrylic nails, they are much safer as acrylics require a lot of harsh filing. They need multiple products containing chemicals, and having acrylic on your nails consistently for long periods can be very weakening. In contrast, press ons require none of that, and they only last a short amount of time.
However, if you don’t maintain them, apply them correctly, use the right products and don’t use the right method to remove them, it can damage your nails. Although this is a risk, the damage is due to human error rather than the press on nails themselves; so as long as you do everything correctly, then damage can be avoided, and the level of risk remains very low.
How to apply press-on nails
Here’s a step-by-step guide on how to apply your press ons, that will ensure they last longer and is safe for your nails:
First of all, wash your hands and clean your nails. Prepping your nails correctly will cause your press ons to last longer. Wash your hands with warm water and soap, paying extra attention to your nails, cleaning both the nail bed and under the nail. Once you’ve washed your hands, dry them thoroughly, you don’t want any liquid on your nails, which can interfere with the glue.
Now your hands are clean; you want to give yourself a mini manicure. Trim your nails, push your cuticles back, file the edge of your nails if needed and buff the surface of your nail. Make sure your nail bed is slightly rough, as this will help the glue adhere better and make your press ons have a stronger hold.
Next, you need to pick out the nails that fit your natural nails. Each nail will typically be a different size, so you need to go through each size to find which one fits the best. Make sure the press on nail fits comfortably from each side of your nail bed. You don’t want any gaps, as not only does it look unprofessional, but it’ll cause your press ons to start lifting much quicker.
Once you’ve picked out all the right sizes, it’s time to start applying them to your nails. If you’re using glue tabs, place the glue tab at the bottom of the press on, peel the plastic layer if it has one and line up the bottom of the press on with your cuticle. If you’re using glue, apply a small amount of glue to the press on nail and your nail bed.
You don’t need too much on either, as once you apply the press on, the amount of glue will have doubled. Leave the glue to get tacky before placing the press on your nail; leave it for about 10 – 15 seconds. Once it’s ready, line up the bottom of the press on with your cuticle.
When it’s in the right position, and you’ve made sure it’s straight, press down the nail, making sure you press down in the middle, both outer corners and the top of the nail for 30-45 seconds for each nail, to make sure the glue has adhered and dried in the right place.
Finally, the finishing touches. Now all your press ons have been stuck on; you can apply a topcoat if you want to add an extra shine and protect the seal; however, this is optional. Apply cuticle oil to finish off the manicure.

How to safely remove them
If you are too rough or abrasive with the removal, you can easily damage your real nails. Thankfully, that’s not necessary, and there are a few different gentle methods that you can use to remove your press-on nails:
Acetone: To remove your press-on nails with acetone, all you need to do is soak your nails in the acetone for about 5 minutes (10 maximum) whilst gently trying to pry off the nail every minute or so. Keep your nails in the acetone until they easily come off, as you don’t want to use any excess force and damage your real nails in the process.
Soap and warm water: You’ll need a bowl of warm water and soap. Soak your hands in the mixture for 15-20 minutes and, again, gently try to pry off the nails every few minutes to help loosen the hold. This is a longer process than using acetone, but it is healthier for your nails as no chemicals are involved. Make sure to keep the water warm throughout, as this is what helps the nails come off, so you may need to add some new water halfway through.
Oil: You can use whatever oil you like, it is completely optional, but cuticle oil, vitamin E oil or body oil are good options. Soak some cotton wool in your oil of choice and press that down onto the press-on nails. Make sure the edges of the nail are covered by the oil-soaked cotton wool so that the oil can get underneath the nail.
If you have any nail polish remover clips, this will make it a much easier process for you as you can do them all at once; if not, you’ll just have to hold it over each nail one at a time. You should start to see the glue loosening after about 5 minutes; once you see the edges starting to lift, you can gently start pulling the press ons to help remove them.
Summary
Press on nails are a great alternative if you want the look of acrylics but don’t like the number of chemicals used and the strain it puts on your nails. If you are someone that’s had first-hand experience of damage from acrylic nails, then it may be hard to believe that there’s little to no damage with press one, but it’s true, and they can be exactly what you’re looking for.
Asegúrese de conseguir uñas prensadas de alta calidad; pueden ser un poco más caras, pero valen la pena; Durarán más, se parecerán más a acrílicos e incluso podrás usarlos varias veces. Mira mi publicación si quieres saber cómo reutilizar las uñas prensadas.
Visto usando Just Read