Stay Gorgeous, Share the Secret!
Hello, nail art lovers! 
When you click on certain links within my blog posts, it may lead you to a product page where you have the opportunity to make a purchase. Please note that if you decide to make a purchase through those links, I may earn a commission from the retailer or brand. For more information, please visit the Affiliate Disclosure page on my blog.
Starfish are not only beautiful marine creatures, but they also symbolize renewal and regeneration. Incorporating starfish into your nail art can add a whimsical and elegant touch to your overall look. Plus, they’re incredibly versatile and can be combined with various colors and designs.
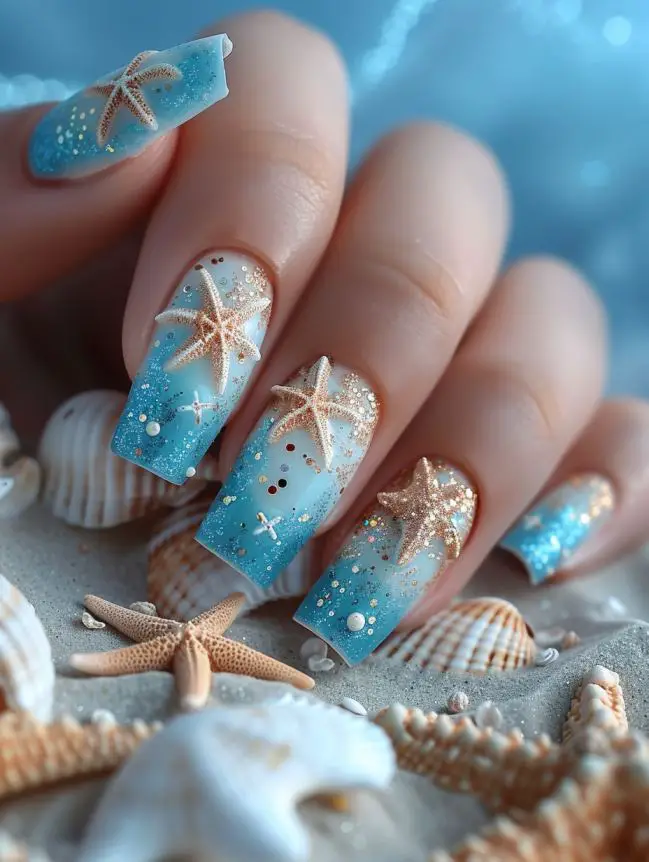
Bring the beach to your nails with a classic beach theme that features starfish, seashells, and sand.
Design Idea:
- Base Color: Start with a sandy beige or a soft blue as your base color to mimic the beach.
- Art Details: Add small starfish using white or gold polish. Complement the look with tiny seashells and dots to represent sand.
Pro Tip: Use a thin brush or nail art pen for detailed starfish. Adding a bit of glitter polish can give the design a sun-kissed sparkle.
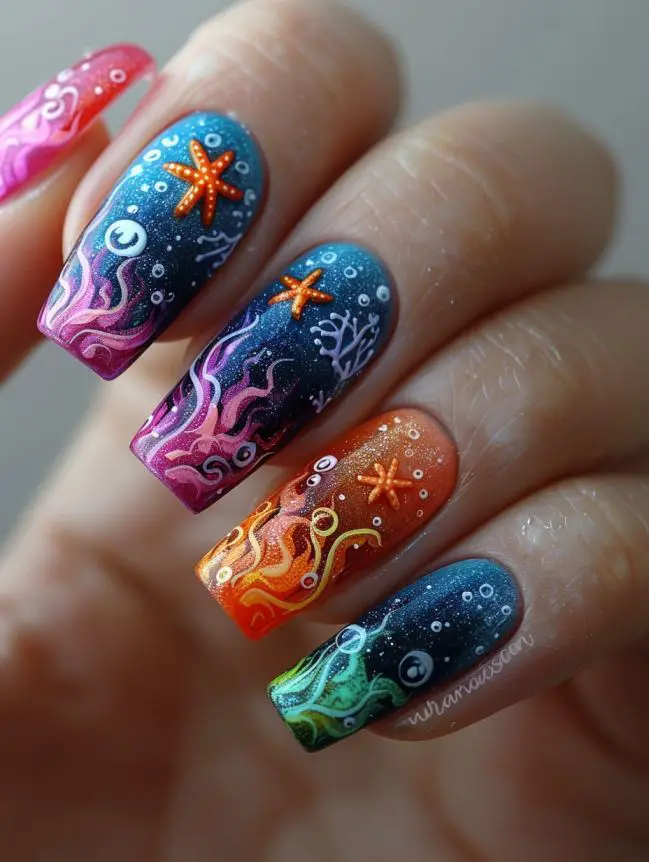
Create an underwater fantasy with vibrant colors and detailed marine life, including starfish.
Design Idea:
- Base Color: Use a gradient of blues and greens to represent the ocean depths.
- Art Details: Paint colorful starfish, coral, and fish. You can use neon colors for the starfish to make them pop.
Pro Tip: For a realistic water effect, use a clear jelly polish over your design. Adding a few bubbles with a dotting tool can enhance the underwater theme.
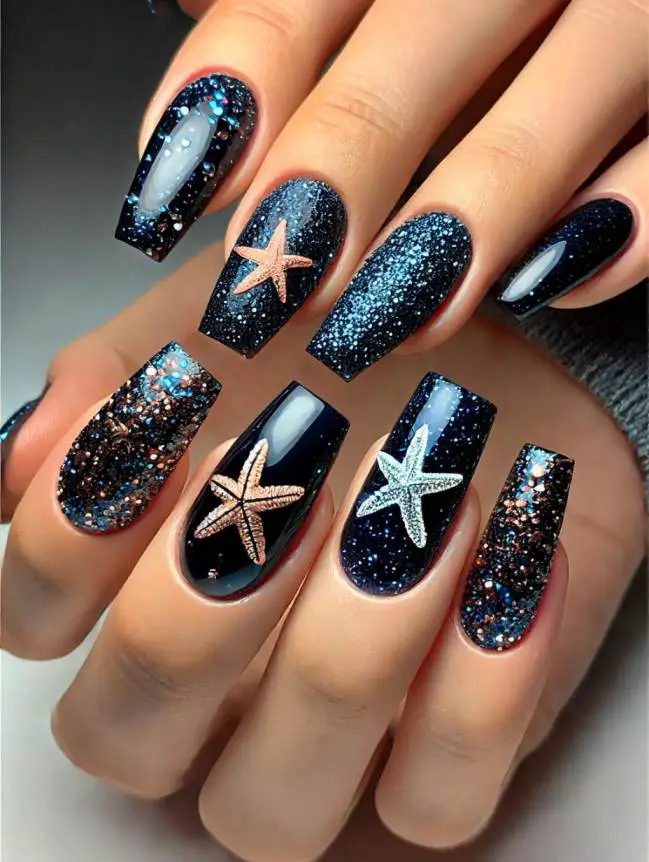
For a glamorous twist, incorporate glitter into your starfish nail art design.
Design Idea:
- Base Color: Choose a dark, solid color like navy blue or black to make the glitter stand out.
- Art Details: Create starfish shapes using glitter polish or glitter powder. You can outline the starfish with a contrasting color for more definition.
Pro Tip: Apply a clear top coat over the glitter to prevent it from flaking off. Using a fine glitter gives a more sophisticated look, while chunky glitter can make the starfish more eye-catching.
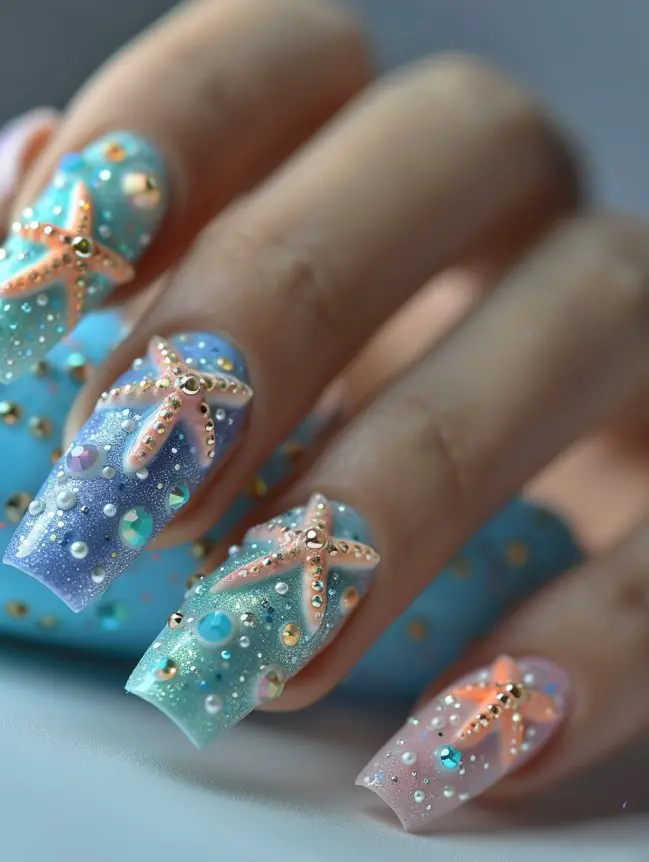
Take your nail art to the next level with 3D starfish embellishments.
Design Idea:
- Base Color: Soft pastel colors like mint green, baby blue, or lavender work well as a base.
- Art Details: Attach 3D starfish charms or create your own using acrylic or gel. You can add pearls and rhinestones for a luxurious finish.
Pro Tip: Ensure the 3D embellishments are securely attached using nail glue or a thick layer of gel. Balance the design with simpler accents on other nails to keep the look cohesive.
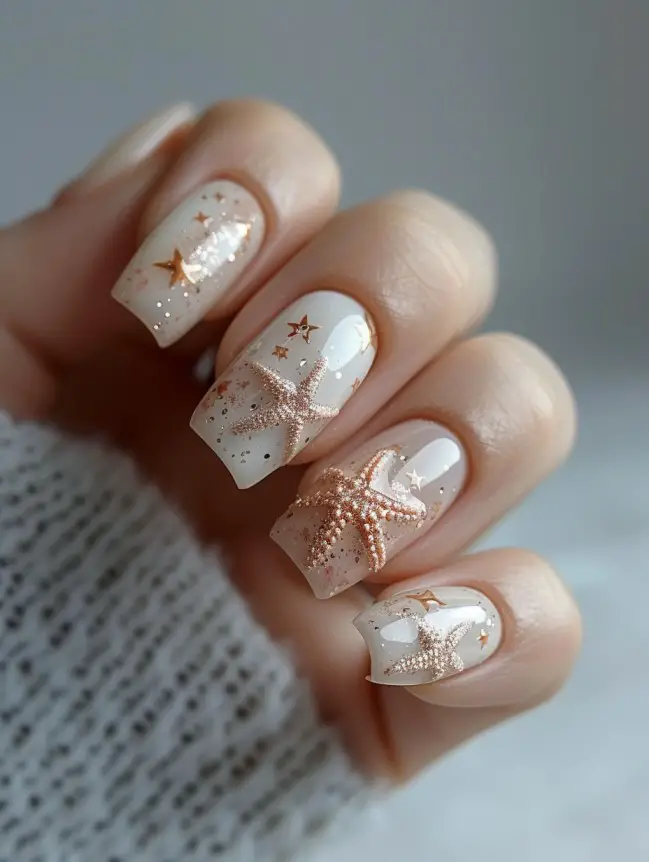
For those who prefer a more subtle look, minimalist starfish designs are perfect.
Design Idea:
- Base Color: Opt for a nude or sheer base color for an elegant, understated look.
- Art Details: Paint tiny starfish on one or two accent nails using white or soft metallic shades. Keep the rest of the nails simple with a clear or nude polish.
Pro Tip: Use a dotting tool for the starfish to ensure they are small and precise. A matte top coat can give a modern twist to this minimalist design.
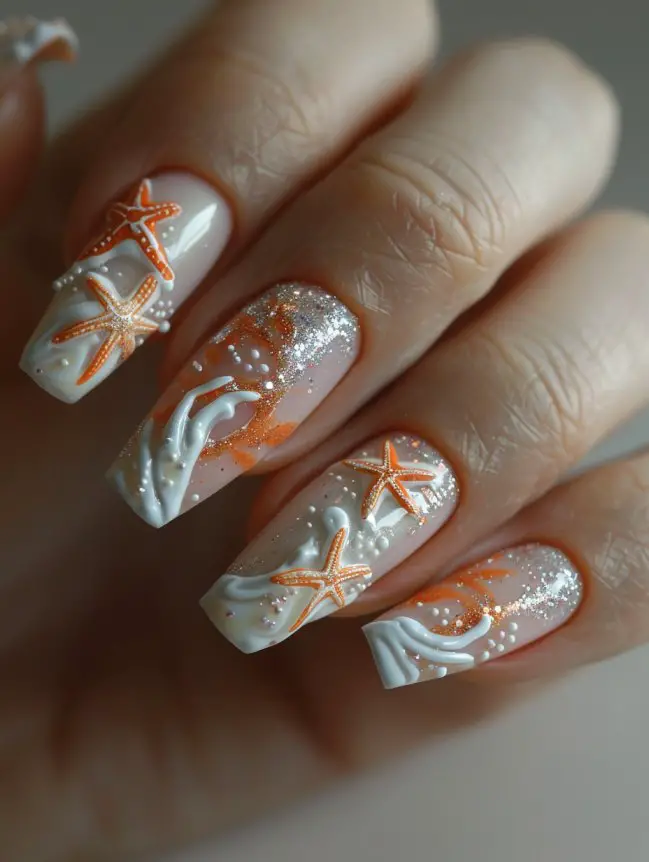
Give the classic French manicure a nautical twist by incorporating starfish designs into the tips.
Design Idea:
- Base Color: Start with a clear or nude base.
- Art Details: Instead of the traditional white tips, paint starfish designs in white or soft pastels on the tips of your nails.
Pro Tip: Use French tip guides to ensure the starfish tips are even. Add a thin line of silver or gold along the edge of the tips for an elegant finish.
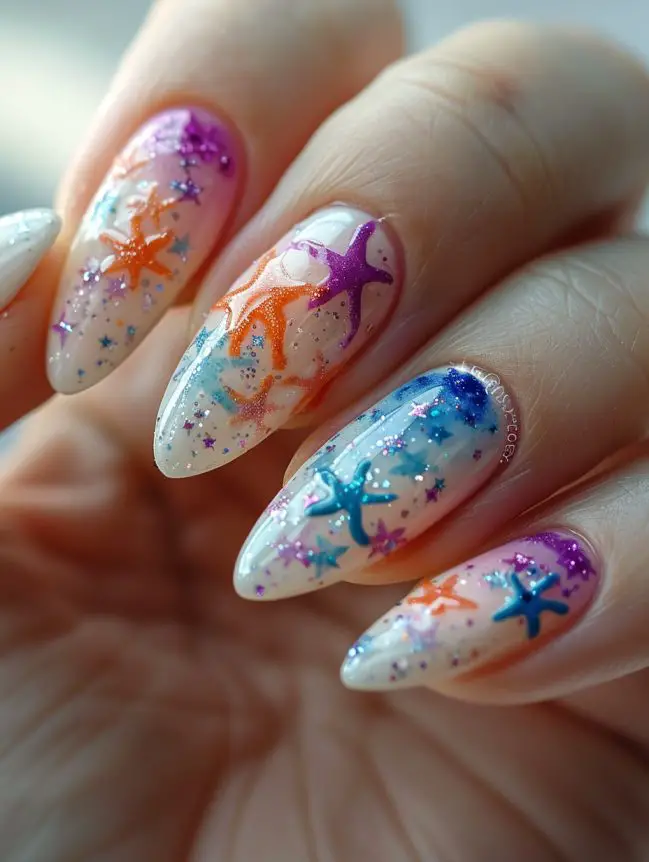
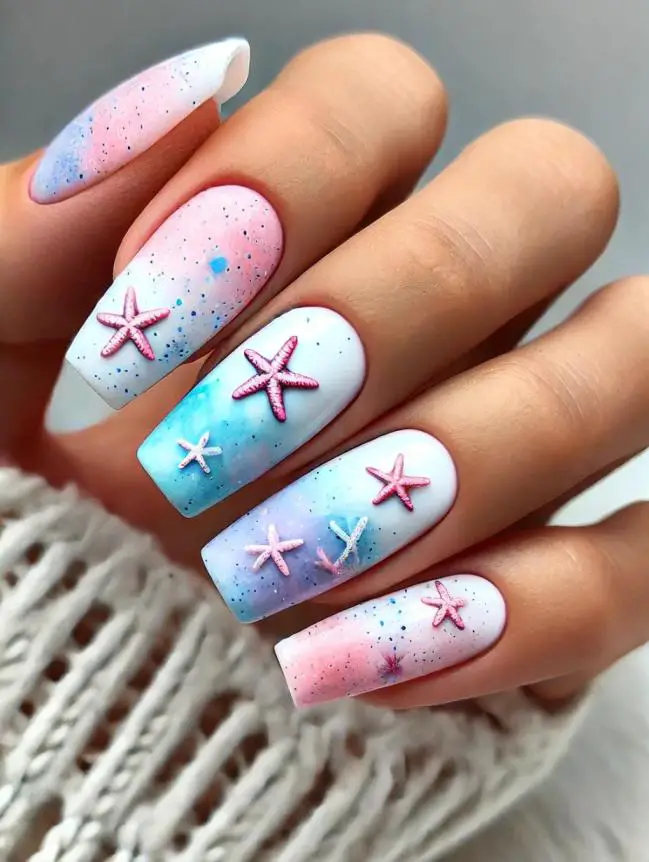
Create a dreamy, watercolor effect with soft, blended colors and delicate starfish designs.
Design Idea:
- Base Color: Use a white or very light pastel base color.
- Art Details: Blend soft shades of blue, pink, and purple for a watercolor effect. Once dry, add small, detailed starfish using a fine brush.
Pro Tip: Use a makeup sponge to dab on the colors for a smooth blend. Seal with a glossy top coat to enhance the watercolor effect.
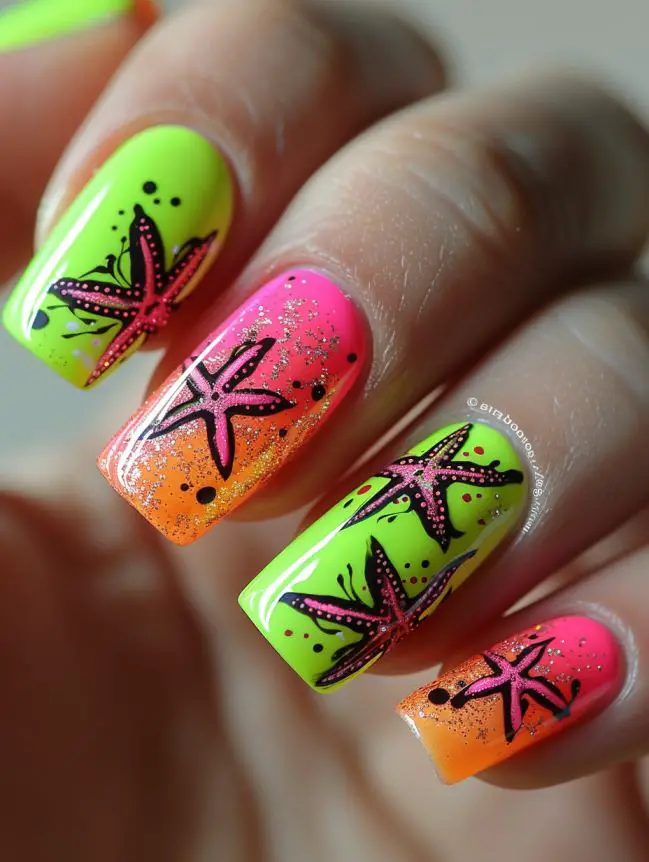
For a bold, eye-catching look, neon starfish designs are perfect for summer parties and beach outings.
Design Idea:
- Base Color: Bright neon colors like pink, green, or orange.
- Art Details: Paint contrasting neon starfish on the nails, using colors that stand out against the base.
Pro Tip: Apply a white base coat under the neon polish to make the colors pop even more. Use a black outline for the starfish to add definition.
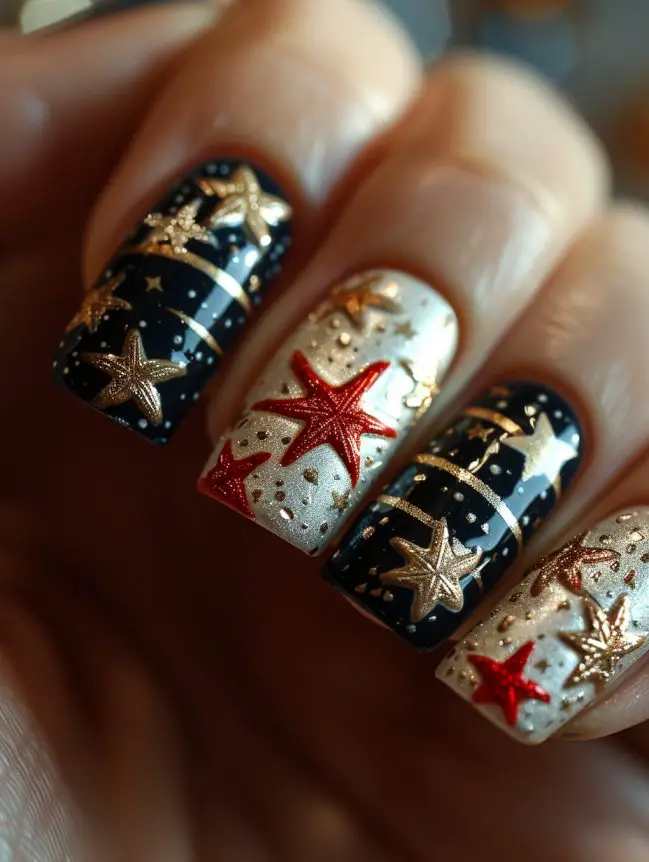
Combine nautical stripes with starfish designs for a chic, maritime look.
Design Idea:
- Base Color: Alternate nails with navy blue and white stripes.
- Art Details: Paint starfish in red or gold on the striped nails.
Pro Tip: Use striping tape to achieve clean, even stripes. A matte top coat can give this design a sophisticated touch.
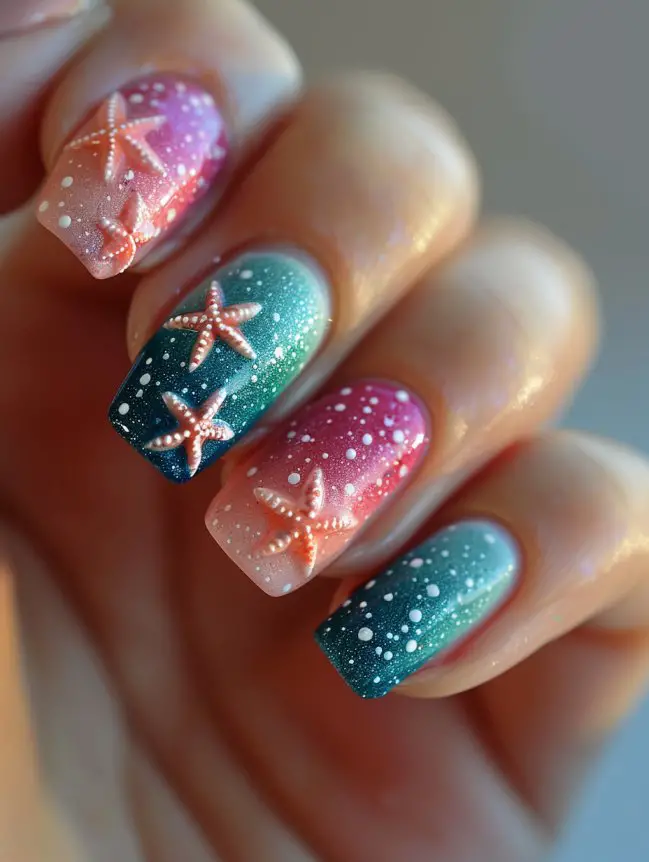
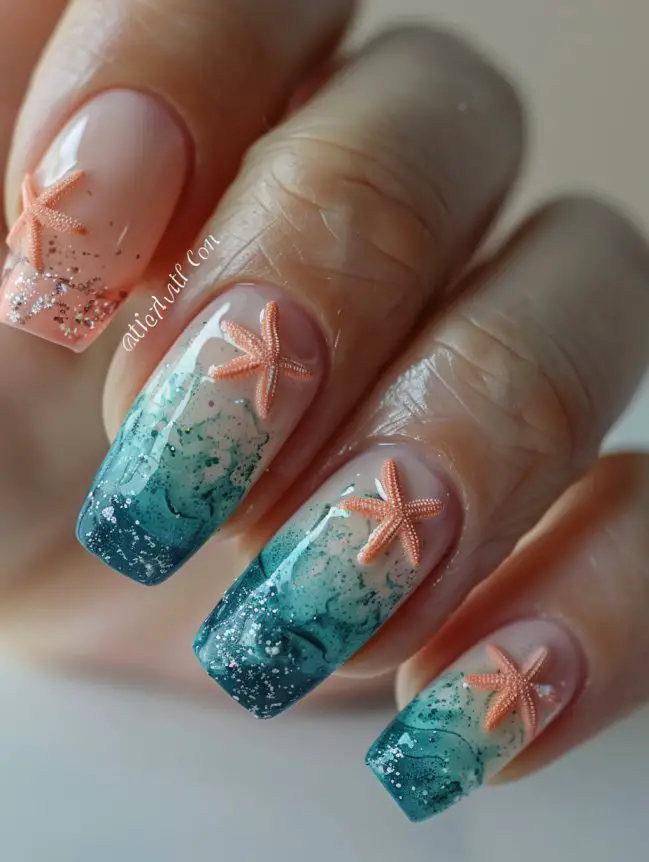
Blend your favorite colors into a seamless ombre, accented with delicate starfish.
Design Idea:
- Base Color: Create an ombre effect with shades of blue, green, or pink.
- Art Details: Add tiny starfish at the base or tip of each nail in a contrasting color.
Pro Tip: Use a sponge to create the ombre effect. For a smoother gradient, dab lightly and blend the colors well.
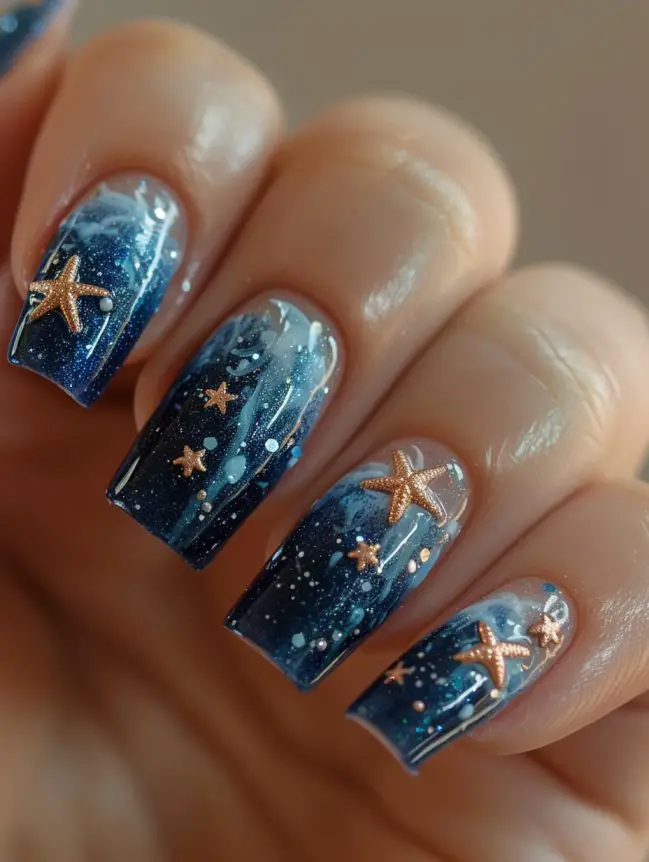
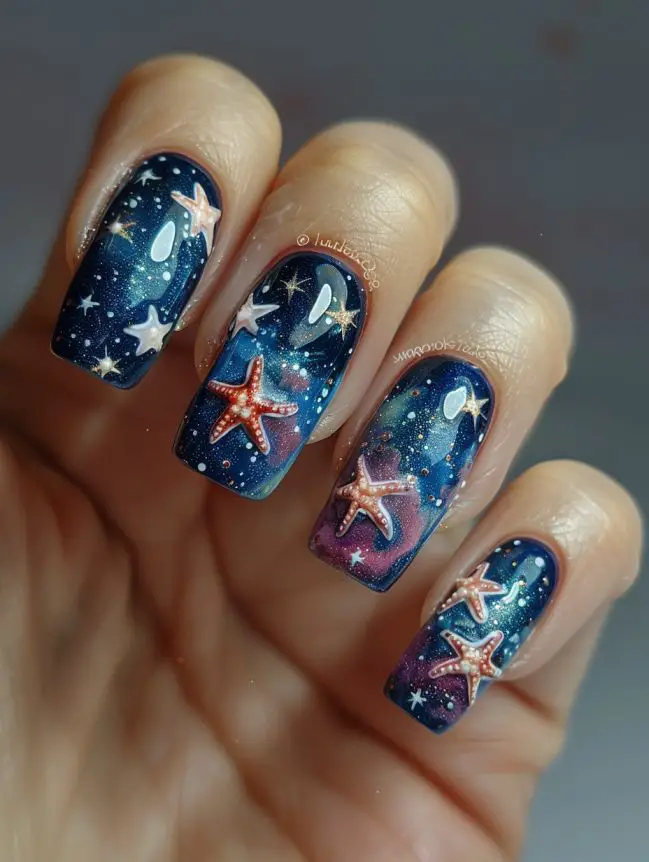
Mix the mystery of the galaxy with the beauty of the ocean by creating a galaxy-themed starfish design.
Design Idea:
- Base Color: Create a galaxy background using dark blue, purple, and black.
- Art Details: Paint small, white starfish over the galaxy background. Add a few stars and dots to enhance the celestial theme.
Pro Tip: Use a sponge to blend the galaxy colors smoothly. A touch of holographic glitter can give the design a starry effect.
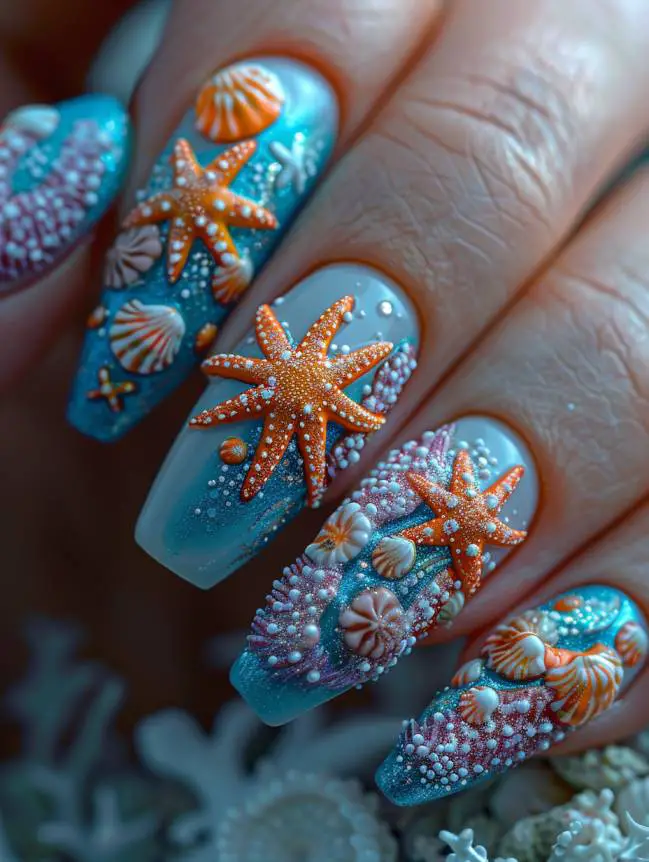
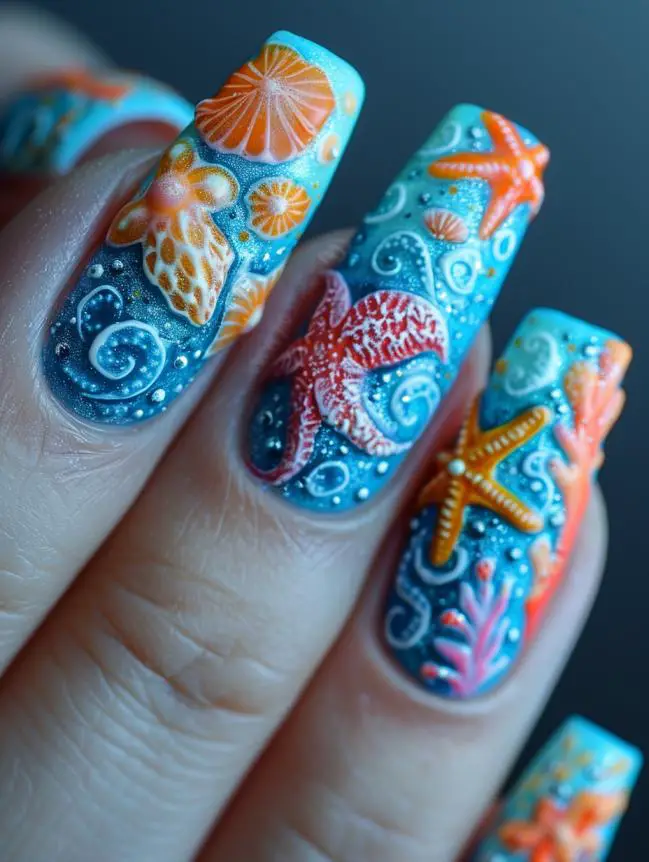
Bring the vibrant colors of a coral reef to your nails with this detailed design.
Design Idea:
- Base Color: Light blue or turquoise to represent the ocean.
- Art Details: Paint starfish in bright coral colors. Add other reef elements like seaweed, small fish, and shells.
Pro Tip: Use fine brushes for detailed elements. Adding a bit of texture with 3D gel can make the reef elements pop.
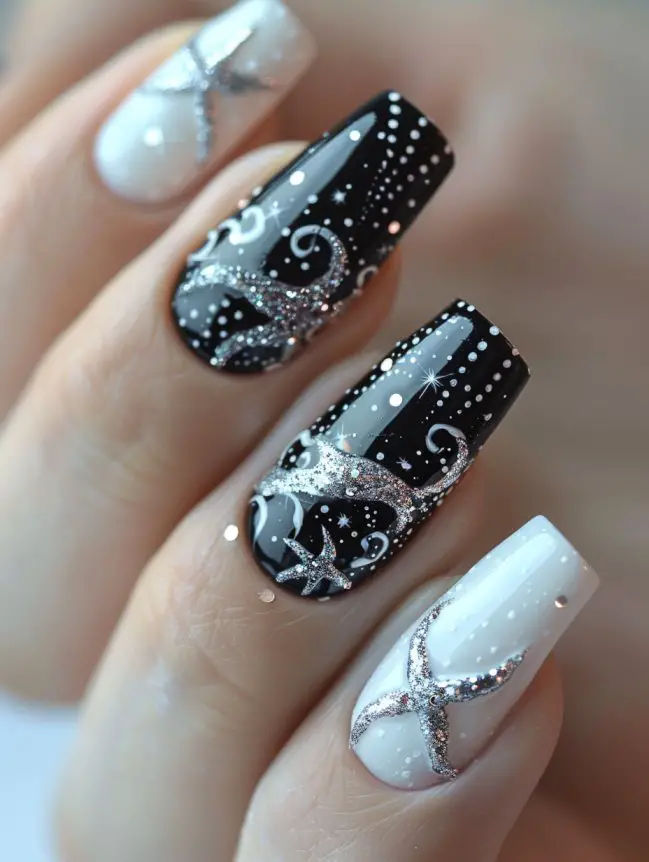
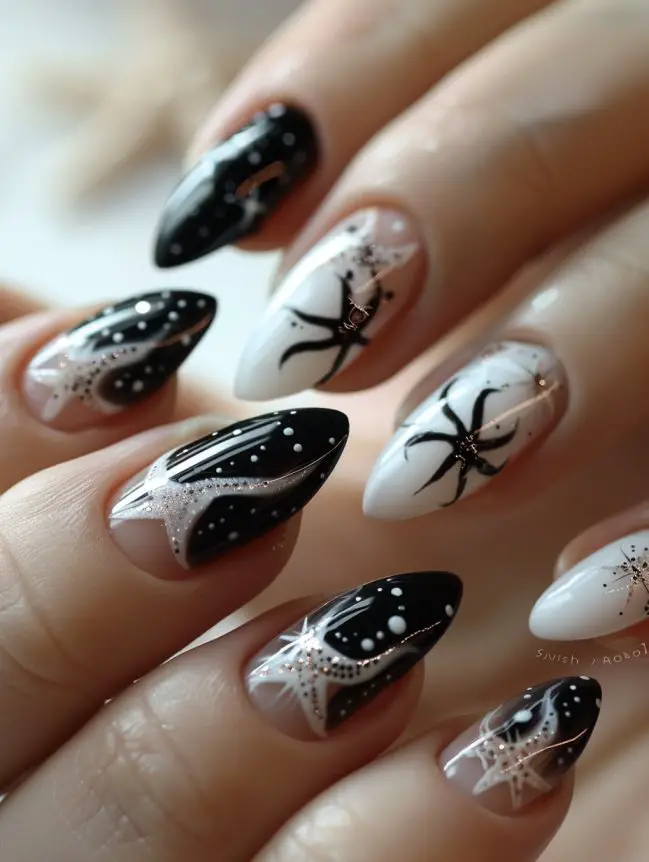
For a chic and modern look, opt for black and white starfish designs.
Design Idea:
- Base Color: Alternate between black and white on different nails.
- Art Details: Paint starfish in the opposite color on each nail. Add geometric patterns for an extra touch of style.
Pro Tip: Use striping tape and dotting tools to achieve clean, precise lines and patterns. A glossy top coat will enhance the contrast.
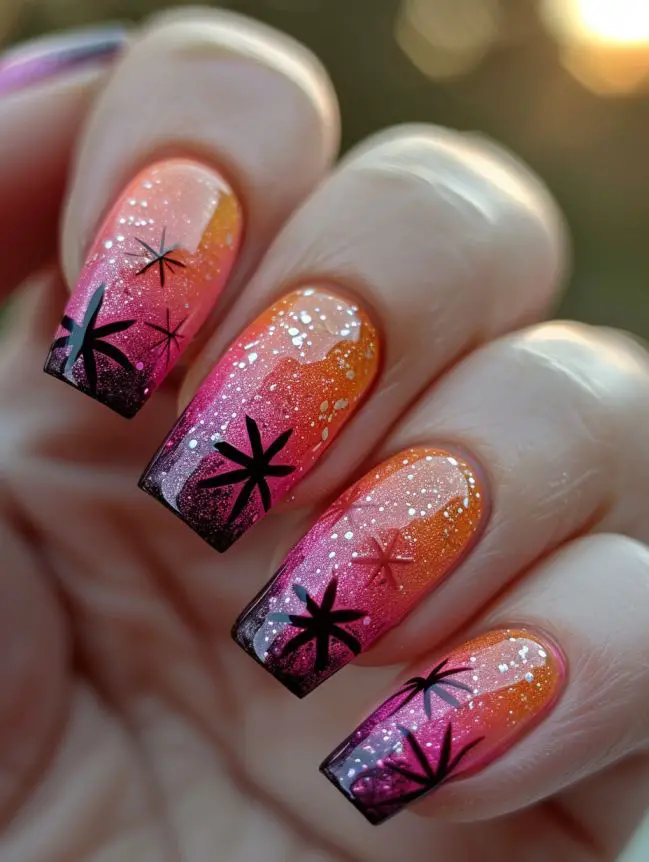
Capture the beauty of a tropical sunset with this colorful and vibrant design.
Design Idea:
- Base Color: Create a sunset gradient with pink, orange, and yellow.
- Art Details: Paint black or white starfish silhouettes over the gradient background.
Pro Tip: Use a makeup sponge to blend the sunset colors seamlessly. A thin brush will help you create detailed starfish silhouettes.
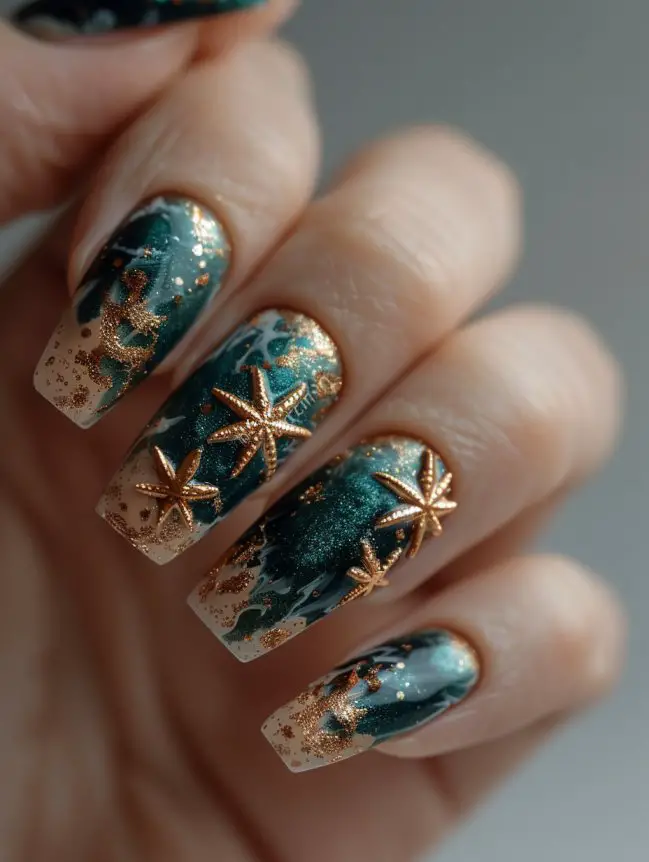
For a sophisticated and modern look, metallic starfish designs add a touch of luxury to your nails.
Design Idea:
- Base Color: Deep, dark shades like navy blue, emerald green, or charcoal grey.
- Art Details: Use metallic nail polish in gold, silver, or rose gold to paint starfish. You can also use metallic nail stickers for a more polished look.
Pro Tip: Apply a glossy top coat to enhance the metallic shine. For added dimension, you can layer different shades of metallic polish.
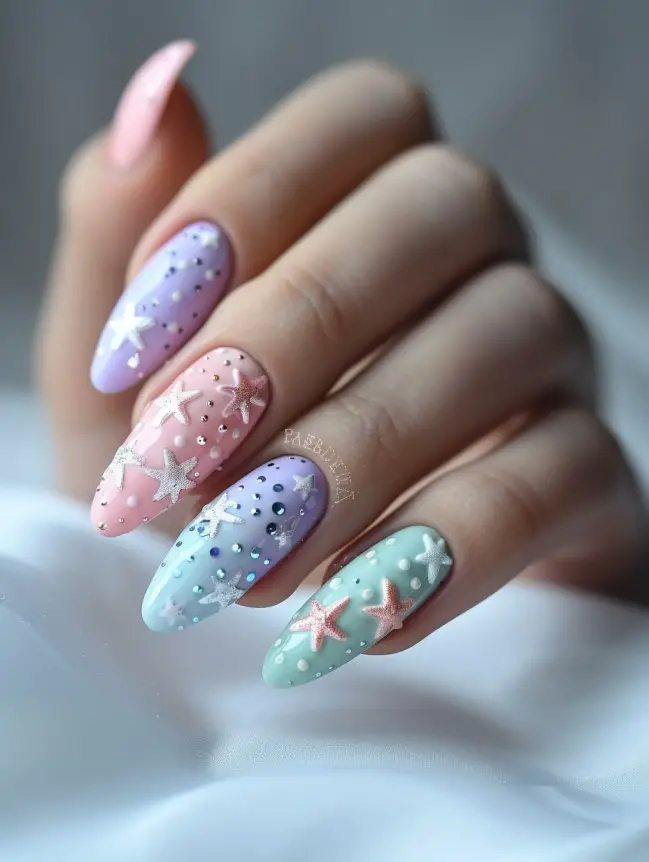
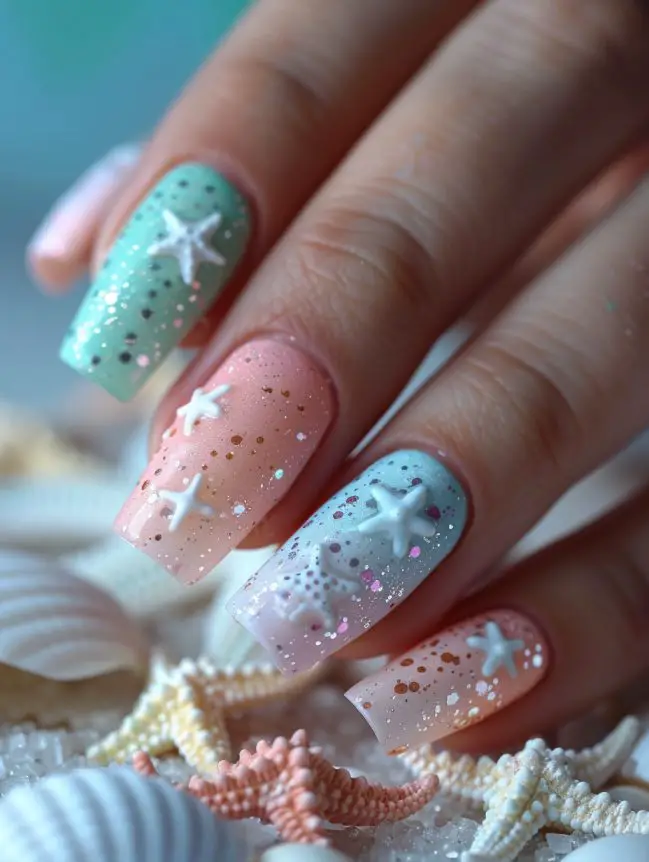
Combine the soft hues of pastels with delicate starfish designs for a dreamy, whimsical look.
Design Idea:
- Base Color: Soft pastel shades like mint green, baby pink, and lavender.
- Art Details: Paint white or light-colored starfish on the nails. Add small dots or hearts for an extra cute touch.
Pro Tip: Use a matte top coat for a smooth, velvety finish. This can enhance the pastel colors and give your design a soft, elegant look.
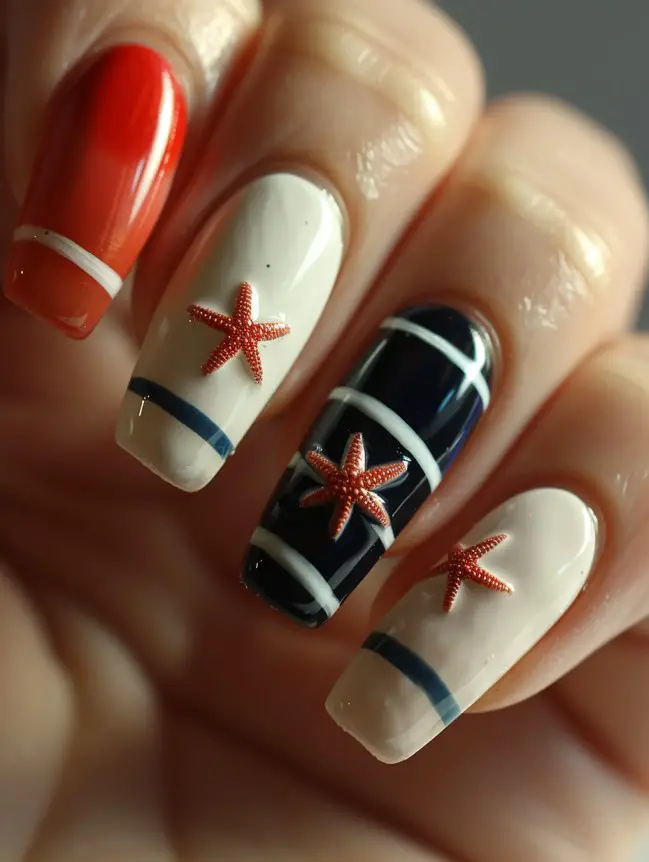
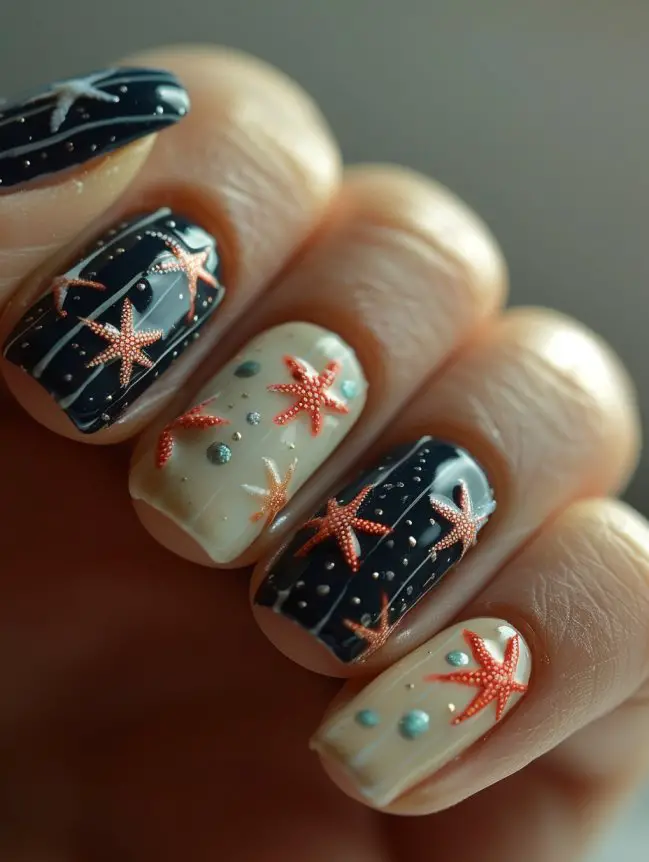
Combine classic nautical stripes with starfish designs for a timeless, seaside-inspired look.
Design Idea:
- Base Color: Alternate white and navy blue stripes on each nail.
- Art Details: Paint small red or white starfish over the stripes for a pop of color.
Pro Tip: Use striping tape to ensure clean, even lines. A glossy top coat can make the stripes and starfish stand out more.
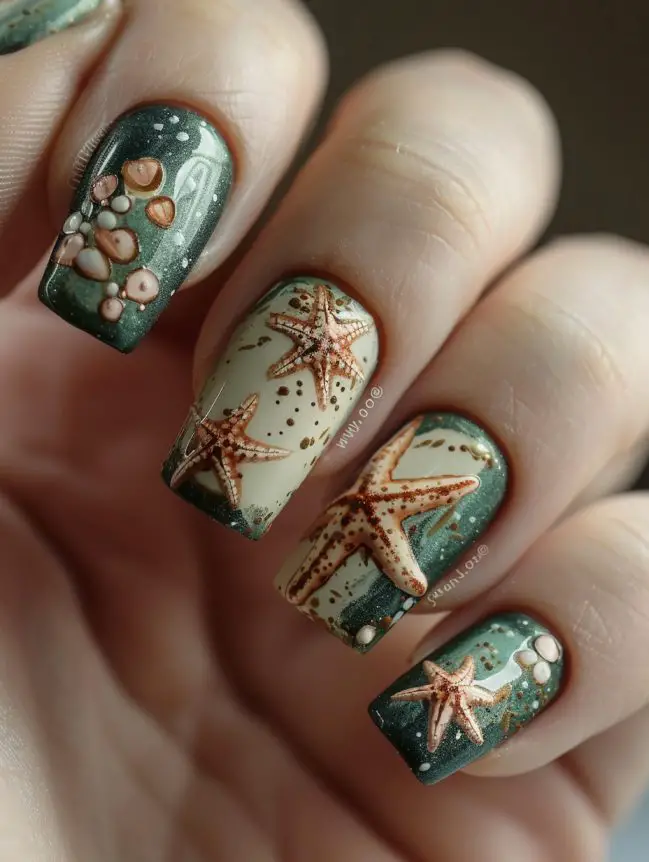
Create a nostalgic, vintage-inspired look with muted colors and intricate starfish designs.
Design Idea:
- Base Color: Use muted, vintage colors like dusty rose, olive green, and soft brown.
- Art Details: Paint starfish in similar muted shades, adding small, intricate details like dots and lines.
Pro Tip: A matte top coat can enhance the vintage feel of your design. Use fine brushes to add delicate details for an authentic vintage look.
Read More-
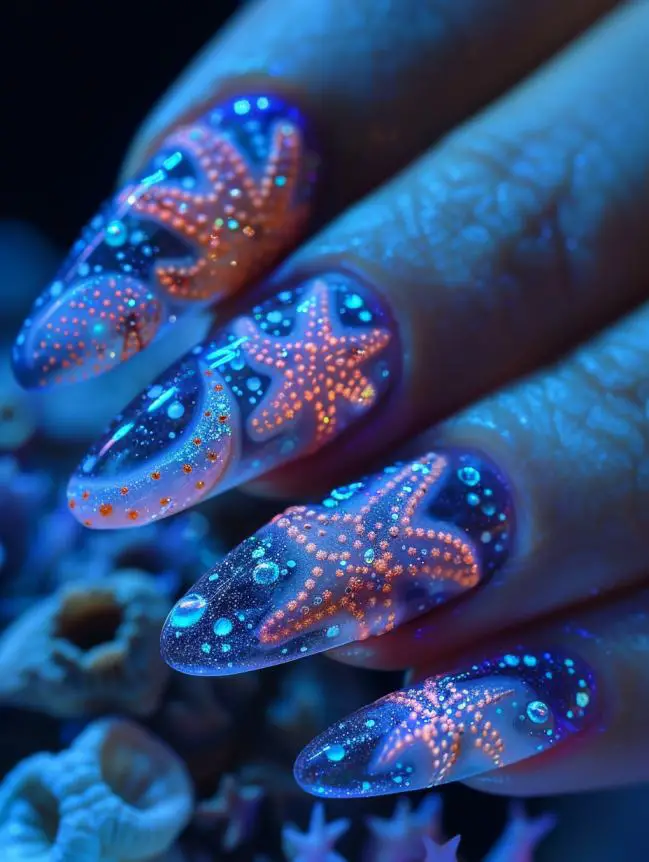
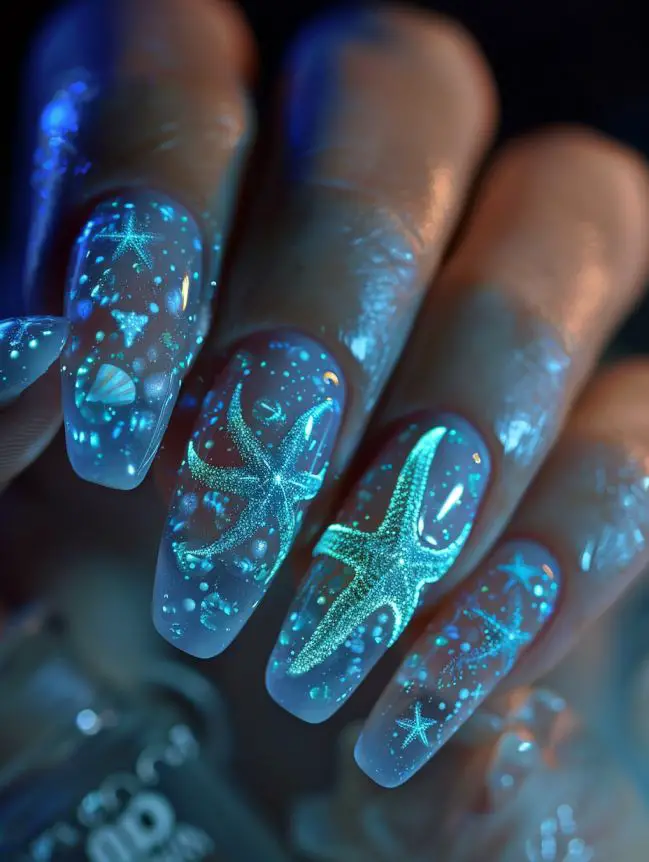
Bring your starfish nail art to life even in the dark with glow-in-the-dark nail polish.
Design Idea:
- Base Color: Use a clear or light-colored base.
- Art Details: Paint starfish using glow-in-the-dark nail polish. You can add additional elements like tiny seashells or dots that also glow.
Pro Tip: Charge your nails under a light source before heading out to make sure they glow brightly. Use a top coat to seal and protect your design.
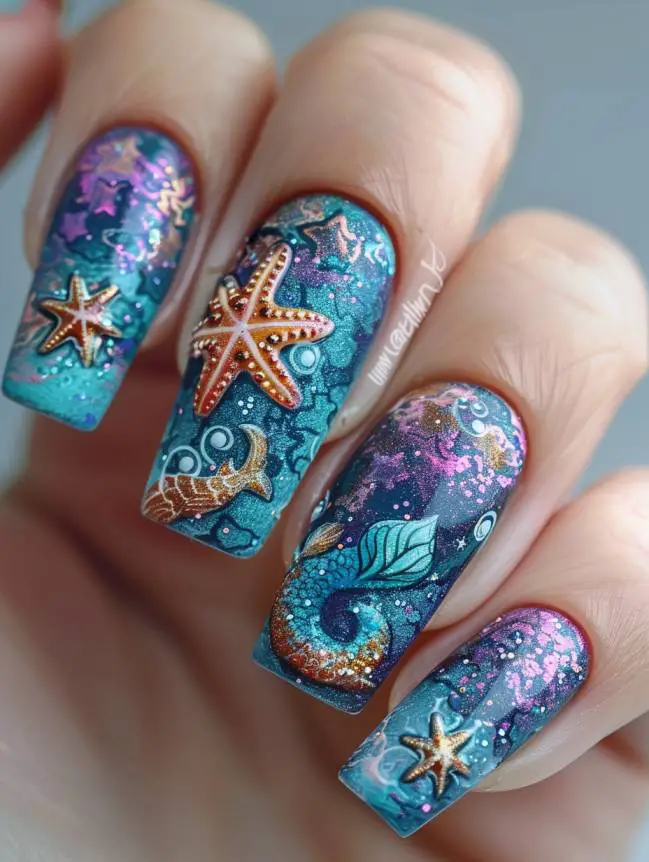
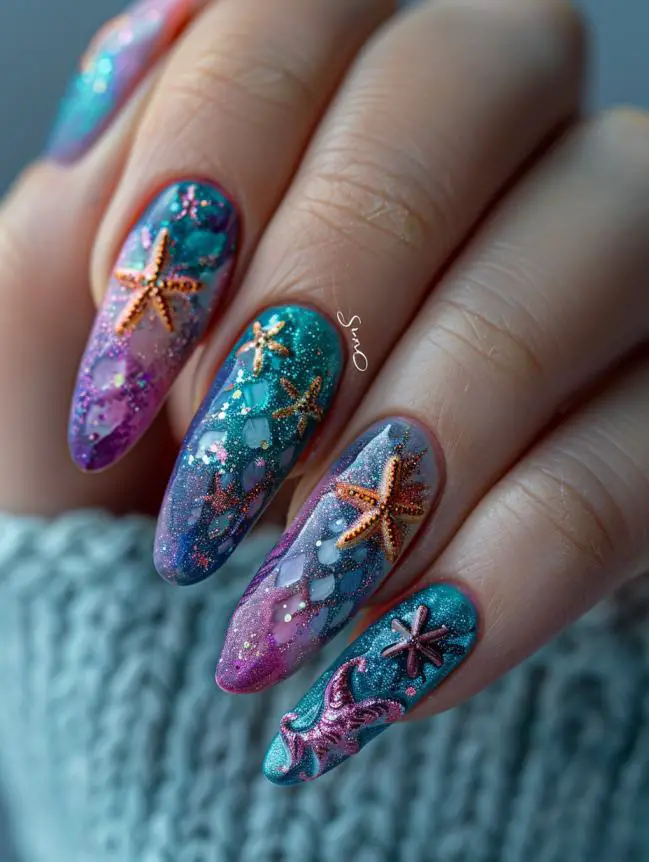
Combine the magic of mermaids with starfish for a truly enchanting nail art design.
Design Idea:
- Base Color: Use shimmery, iridescent colors like teal, purple, and pink.
- Art Details: Paint starfish on a few nails and create mermaid scales on others using a scale stencil or fine brush.
Pro Tip: Add a layer of holographic glitter for an extra magical effect. A glossy top coat will enhance the shimmer and make your nails look mermaid-perfect.
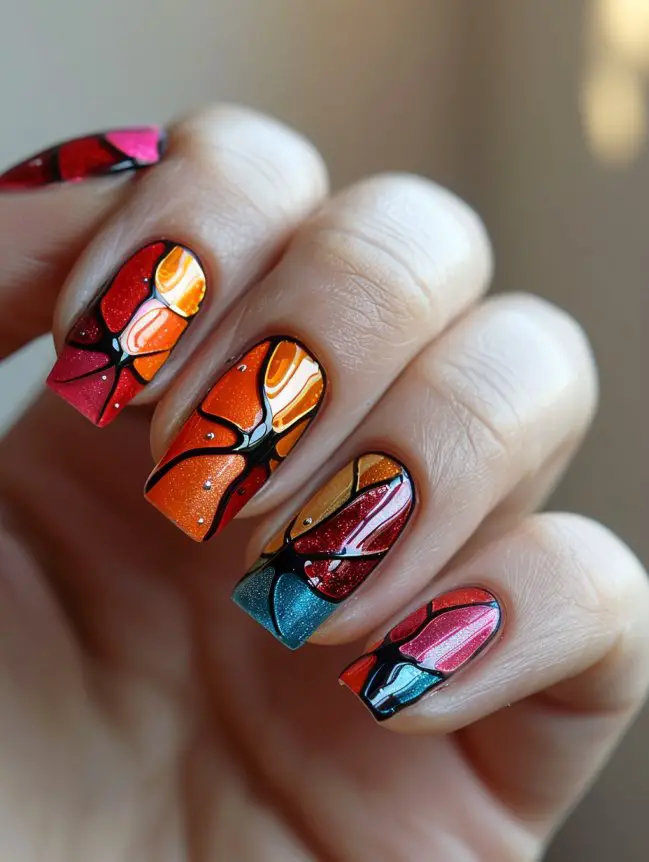
Create a stained glass effect with bright colors and starfish designs for a unique and artistic look.
Design Idea:
- Base Color: Use a sheer or clear polish.
- Art Details: Outline starfish shapes with black polish and fill in the sections with different bright colors to mimic stained glass.
Pro Tip: Use a fine brush for the outlines and a dotting tool or small brush for filling in the colors. A high-gloss top coat will give it a glass-like finish.
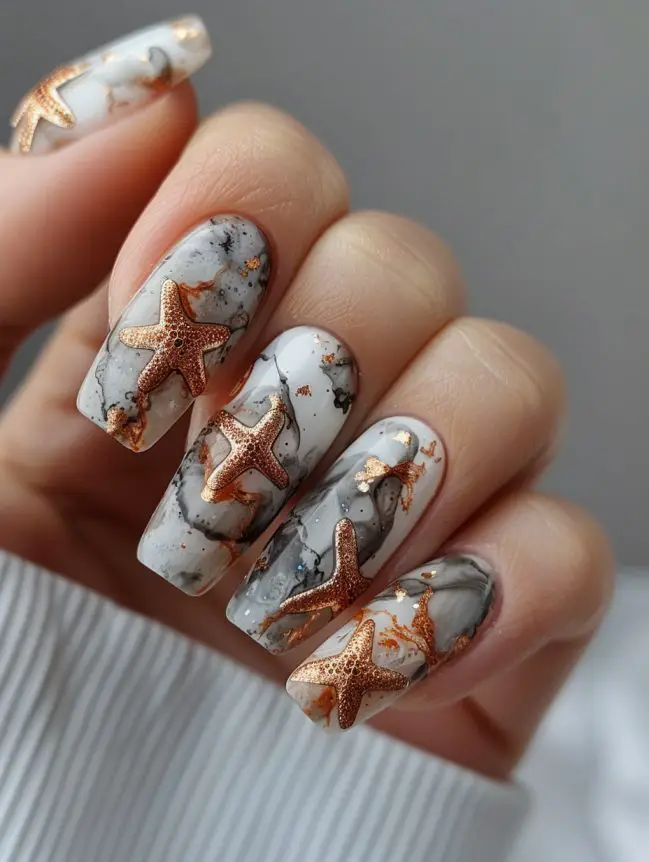
Combine the elegance of marble with the charm of starfish for a sophisticated design.
Design Idea:
- Base Color: Create a marble effect using white and grey polish.
- Art Details: Paint starfish on the marble nails in a contrasting color like gold or silver.
Pro Tip: Use a plastic wrap or a nail stamper to create the marble effect. A matte top coat can add a chic, modern touch to the design.
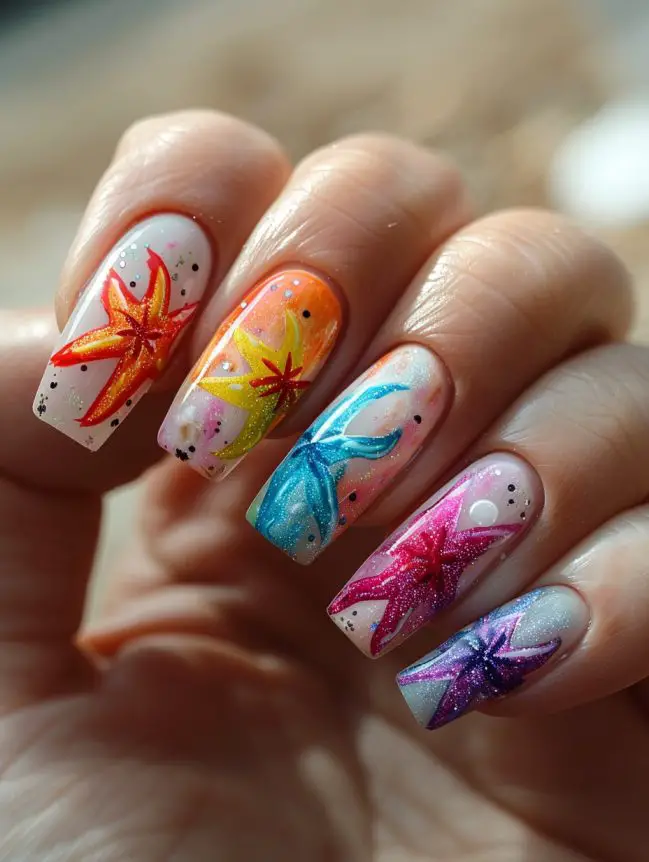
Celebrate color with rainbow-themed starfish nail art, perfect for summer or pride celebrations.
Design Idea:
- Base Color: Use white or a very light color to make the rainbow stand out.
- Art Details: Paint each starfish in a different color of the rainbow on different nails or create rainbow stripes with starfish accents.
Pro Tip: Use a thin brush to paint precise rainbow stripes. Seal with a top coat to make the colors pop and last longer.
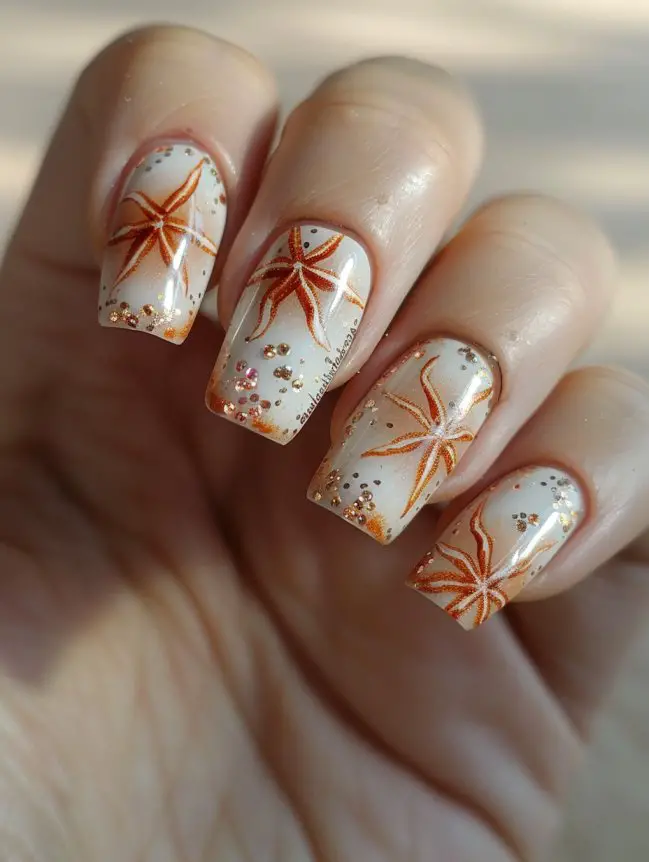
Negative space designs are chic and modern, allowing parts of your natural nail to show through the design.
Design Idea:
- Base Color: Apply a clear or nude base coat.
- Art Details: Paint starfish on your nails, leaving parts of the starfish unpainted to create a negative space effect.
Pro Tip: Use tape or stencils to create clean edges for the negative space. A glossy top coat will enhance the natural shine of your nails and the design.
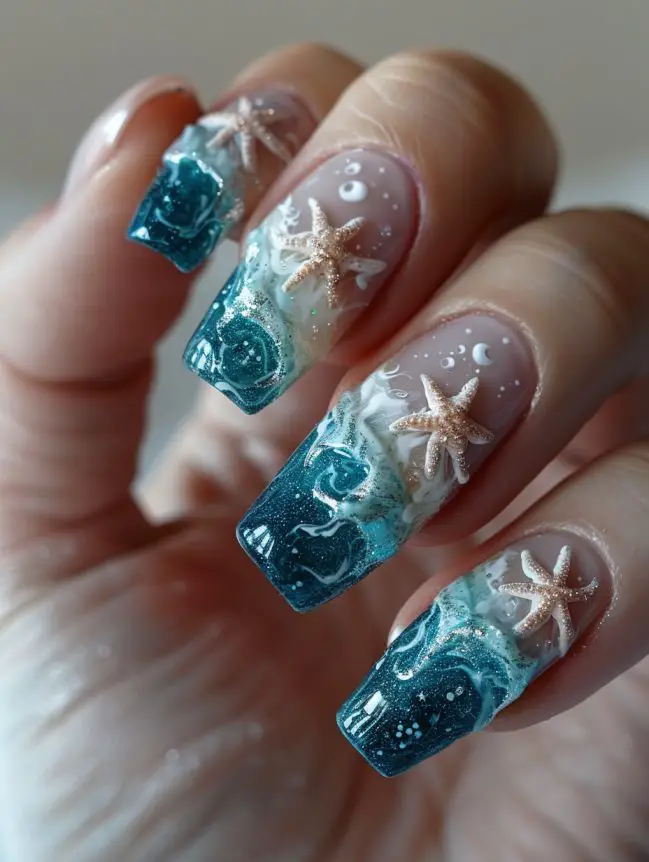
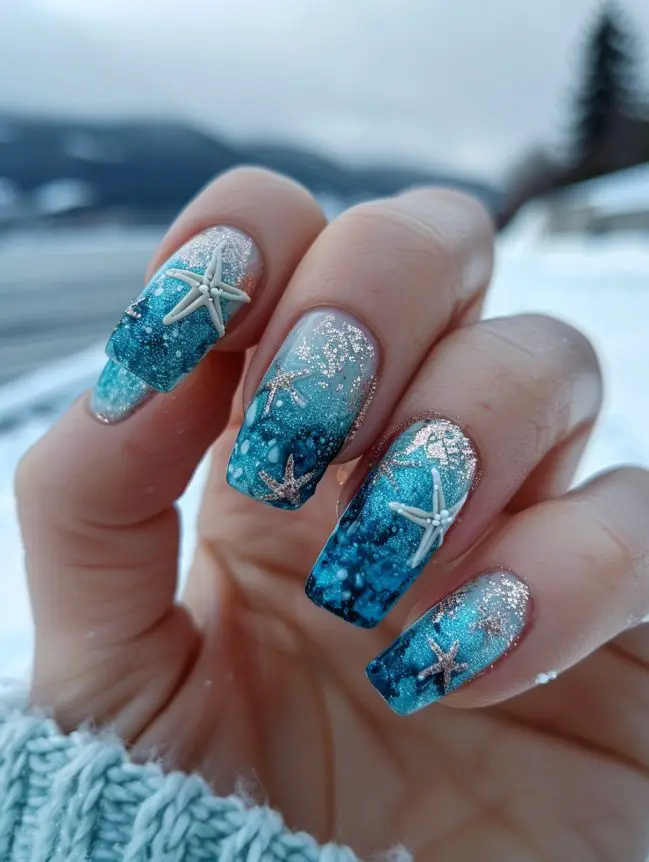
Combine starfish with wave patterns for a dynamic, ocean-inspired look.
Design Idea:
- Base Color: Light blue or turquoise to represent the sea.
- Art Details: Paint waves on the tips of your nails using white and darker blue shades. Add starfish accents to complete the design.
Pro Tip: Use a thin brush to create detailed wave patterns. Adding a bit of glitter to the waves can mimic the sparkle of sunlight on water.
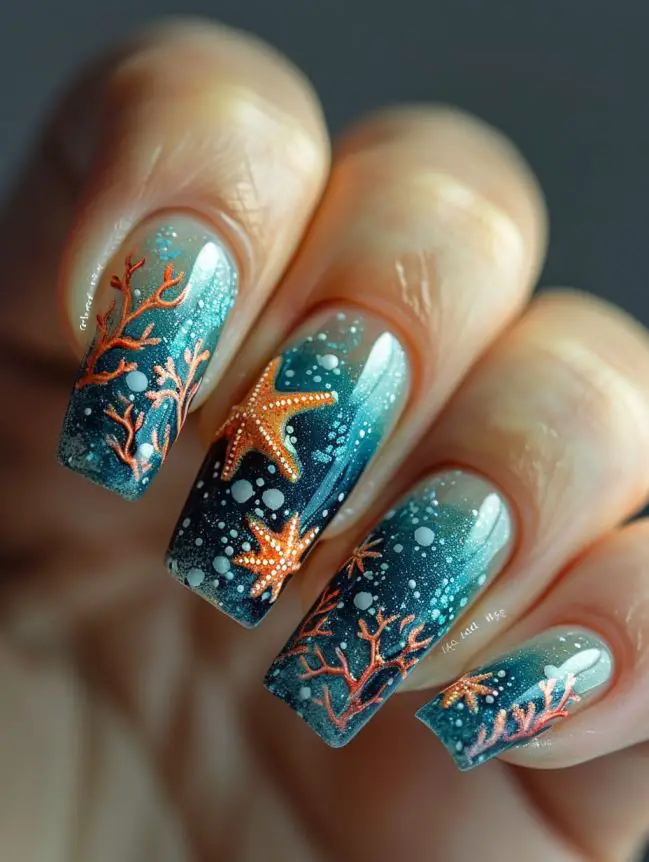
Create a tropical reef on your nails with coral and starfish designs.
Design Idea:
- Base Color: Use a gradient of blues and greens for an oceanic background.
- Art Details: Paint starfish on one or two accent nails and add coral designs on the others using vibrant coral colors.
Pro Tip: Layer different shades of coral and starfish colors for a more realistic and textured look. A glossy top coat can make the colors pop.
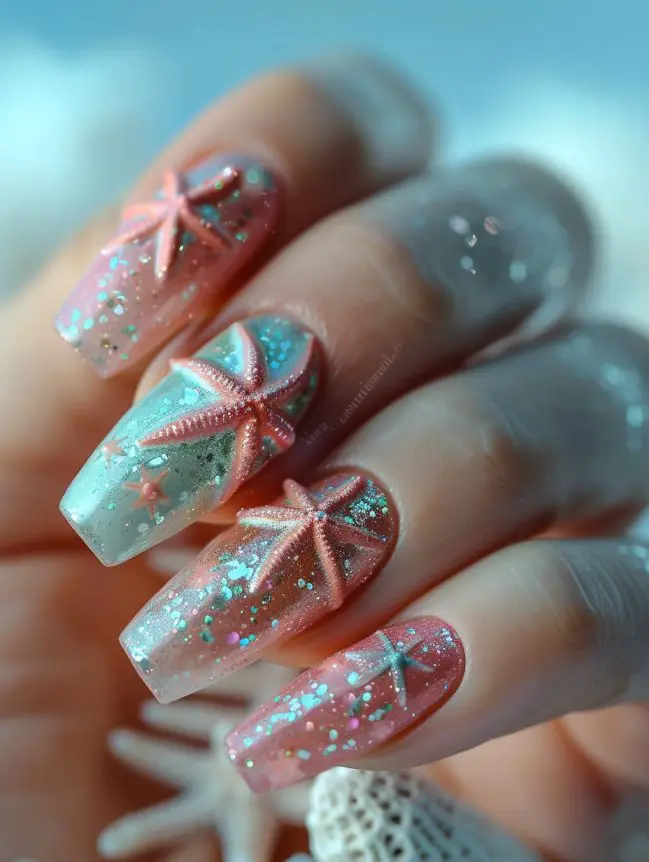
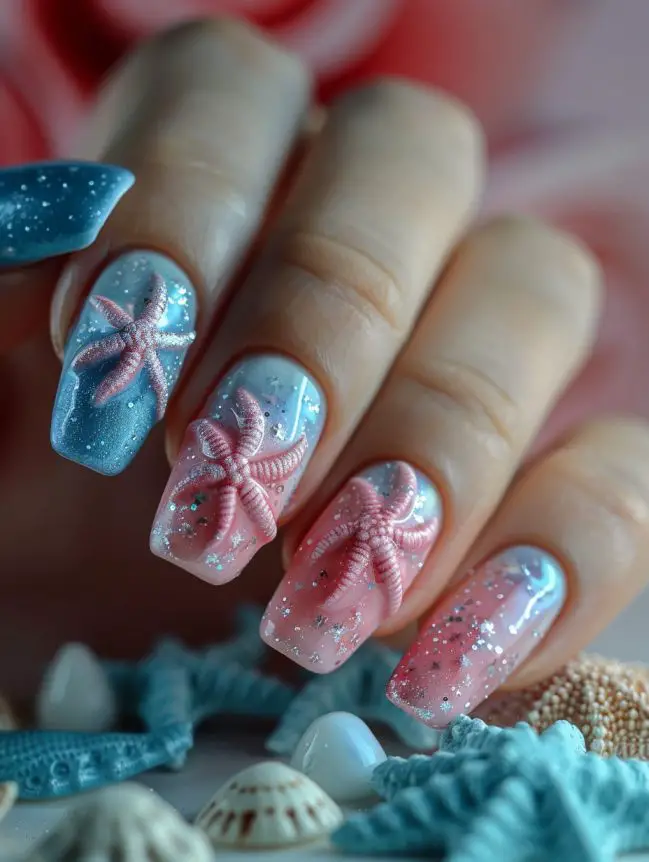
For a sleek and stylish look, try a monochrome starfish design using different shades of the same color.
Design Idea:
- Base Color: Choose a base color in a medium shade, like mid-tone blue or pink.
- Art Details: Paint starfish in lighter and darker shades of the base color.
Pro Tip: Use a matte top coat for a sophisticated finish. Monochrome designs are easy to match with any outfit.
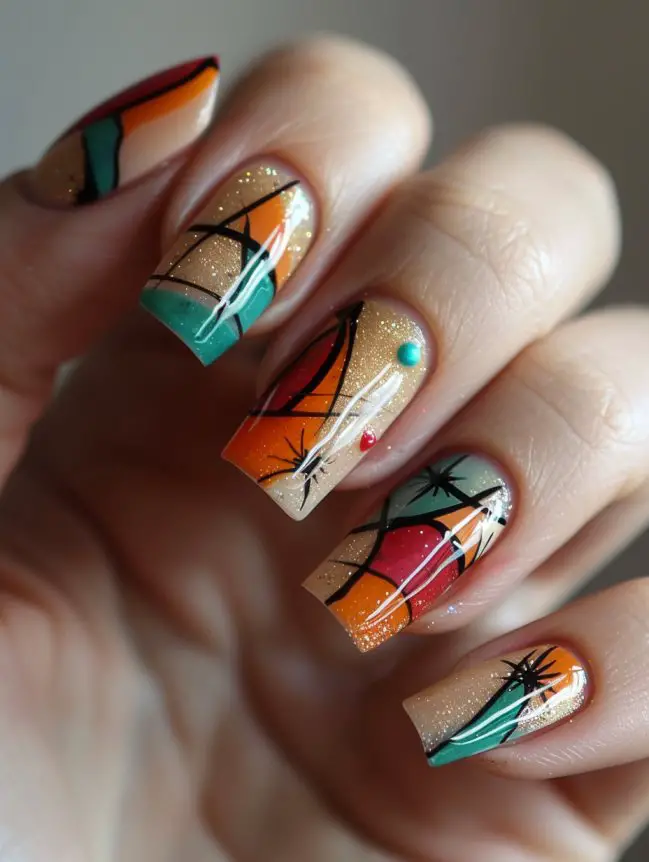
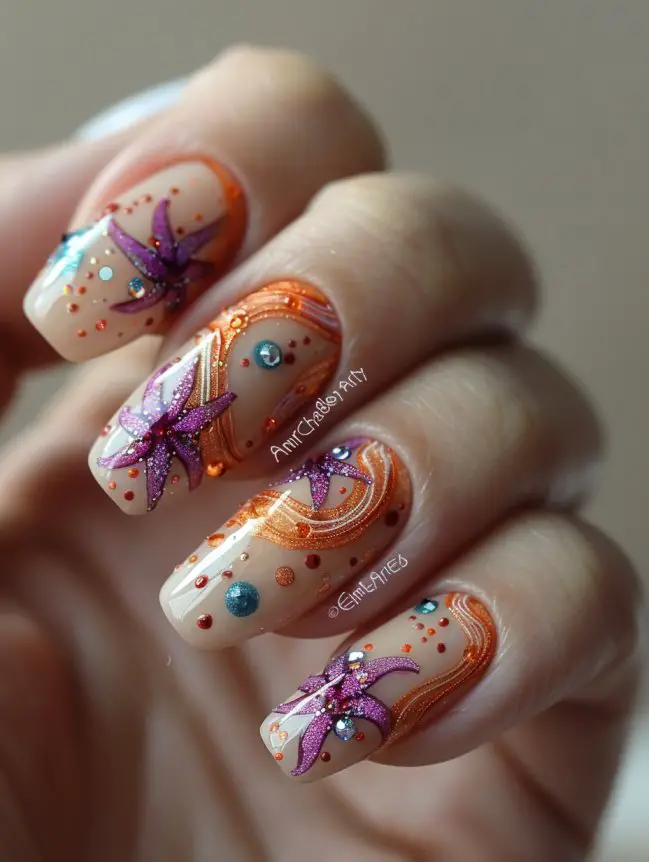
Combine geometric patterns with starfish for a modern and artistic design.
Design Idea:
- Base Color: Use a neutral shade like white or beige.
- Art Details: Paint geometric shapes in contrasting colors and add small starfish within the shapes.
Pro Tip: Use striping tape to create clean geometric lines. A mix of matte and glossy finishes can add depth to the design.
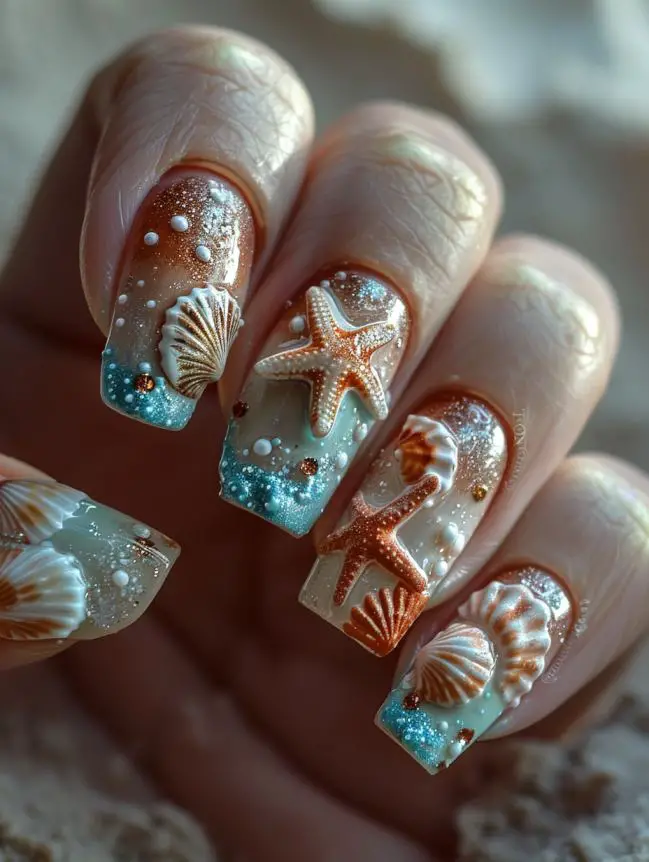
Incorporate the beauty of seashells into your starfish nail art for a complete oceanic look.
Design Idea:
- Base Color: Use soft sandy beige or a light blue to represent the beach or sea.
- Art Details: Paint small starfish alongside detailed seashells on each nail.
Pro Tip: Use a fine detail brush to create intricate shell patterns. A touch of iridescent or pearl polish can give the shells a realistic shimmer.
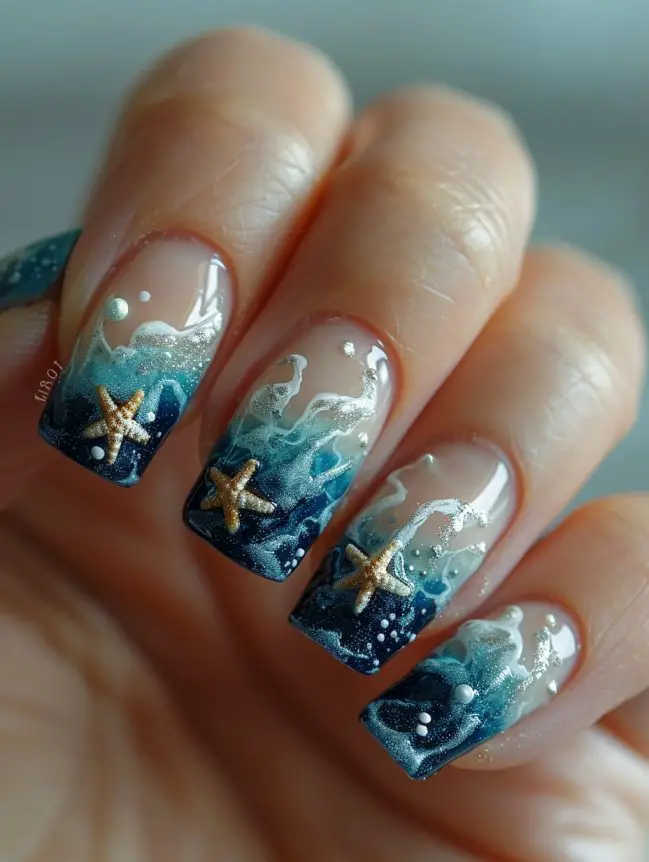
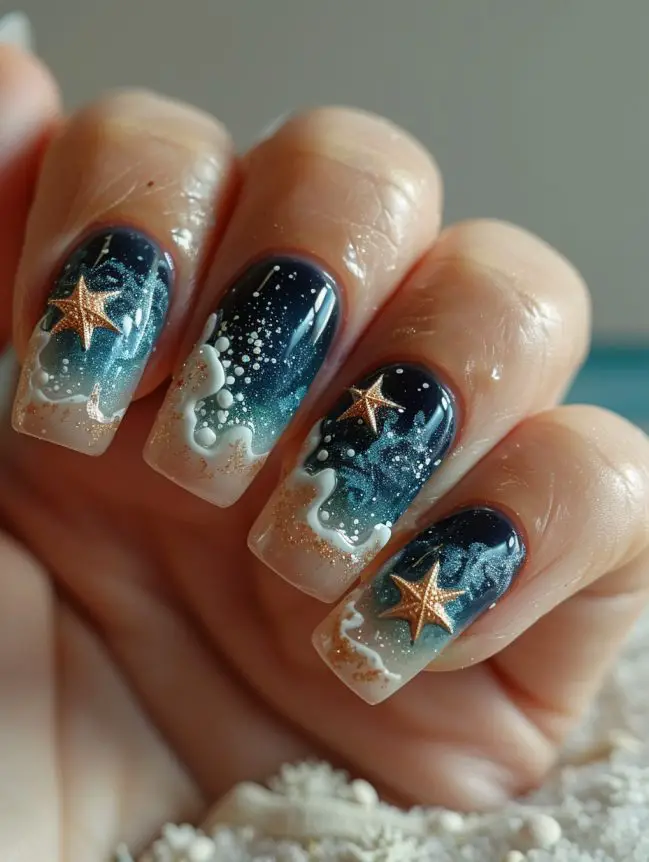
Combine the trend of gradient ombre with starfish designs for a beautiful and smooth transition of colors.
Design Idea:
- Base Color: Create a gradient ombre with two or three shades of blue.
- Art Details: Paint small white or gold starfish over the gradient for a stunning contrast.
Pro Tip: Use a makeup sponge to blend the colors seamlessly. Seal the design with a glossy top coat for a smooth finish.
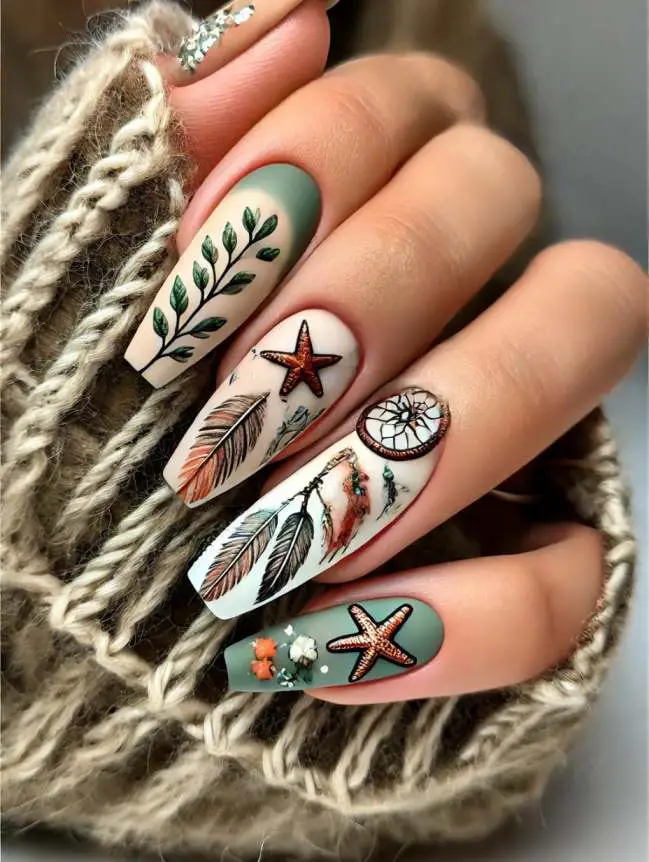
Boho-inspired starfish nail art is perfect for a relaxed and artistic vibe.
Design Idea:
- Base Color: Use earthy tones like muted greens, browns, and off-whites.
- Art Details: Add starfish along with other boho elements like feathers, arrows, and dreamcatchers.
Pro Tip: Use a combination of freehand painting and decals for a detailed design. A matte top coat can enhance the boho look.
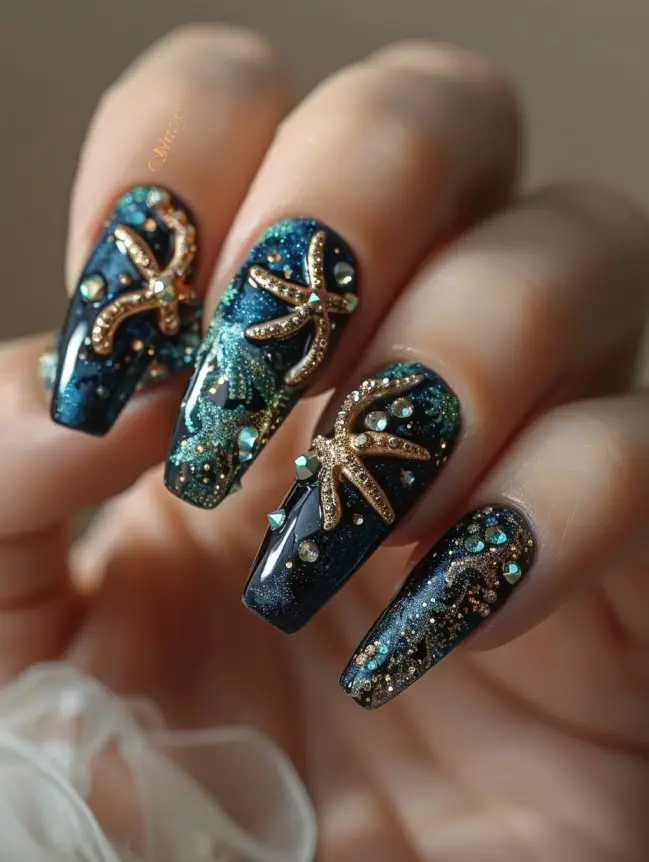
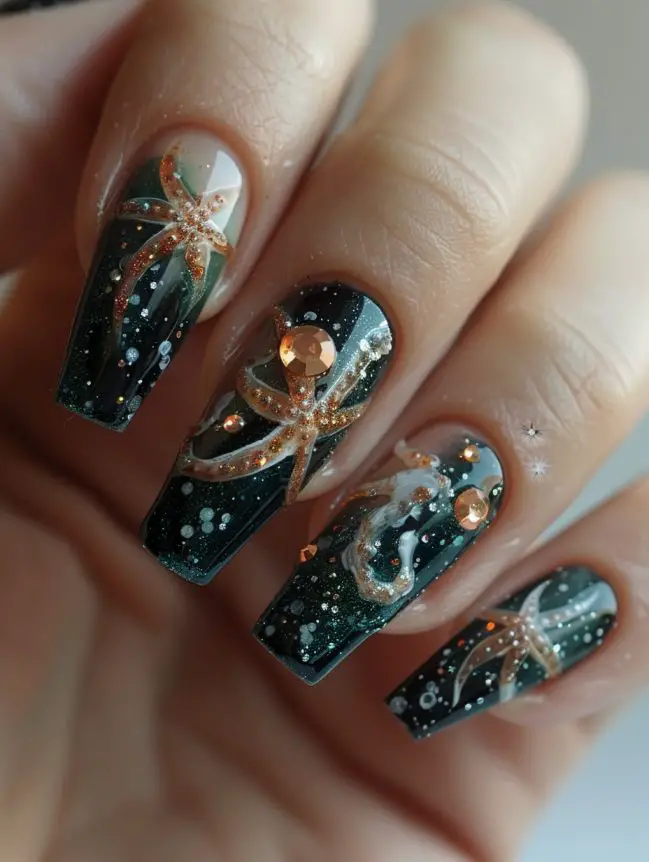
Add a touch of luxury to your starfish nail art with jewel embellishments.
Design Idea:
- Base Color: Deep, rich colors like royal blue, emerald green, or burgundy.
- Art Details: Paint starfish and add small jewel accents on each nail for a glamorous touch.
Pro Tip: Use nail glue to secure the jewels firmly. Apply a layer of gel top coat for extra protection and shine.
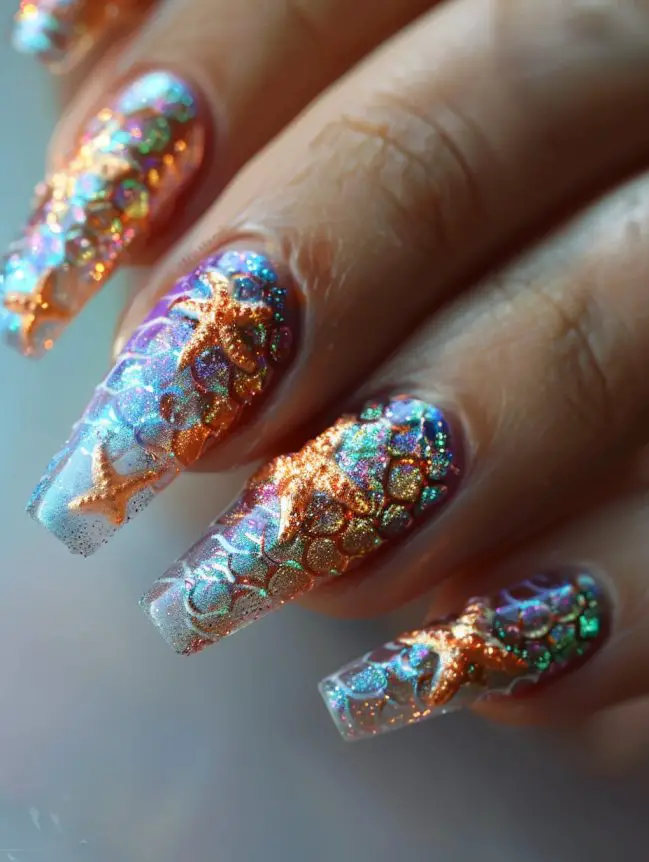
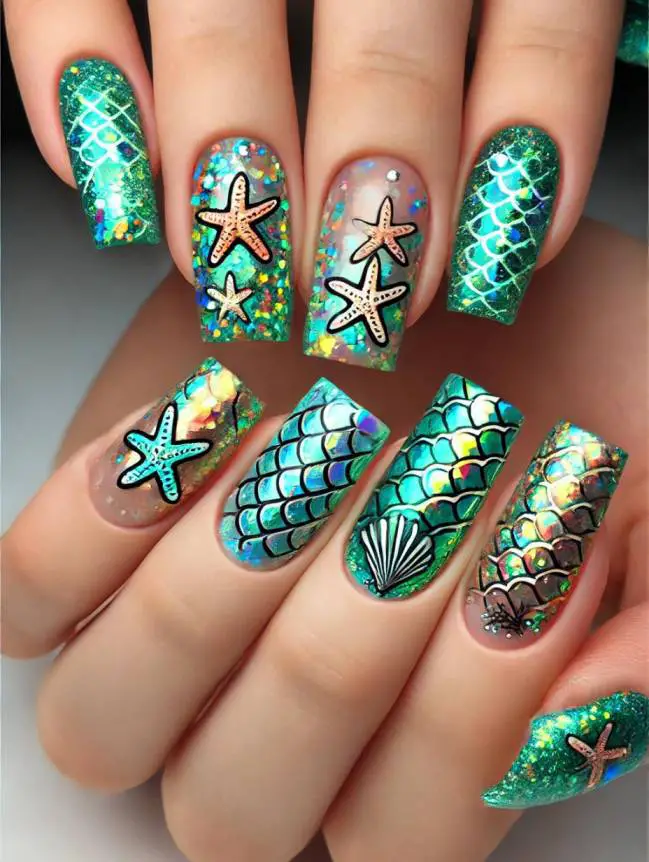
Create a mermaid-inspired look by combining starfish with fish scale patterns.
Design Idea:
- Base Color: Use a shimmery, iridescent base color to mimic fish scales.
- Art Details: Paint starfish and add fish scale patterns using stencils or freehand techniques.
Pro Tip: Add a layer of holographic glitter polish for an enchanting, underwater effect. A glossy top coat will enhance the shine and durability.
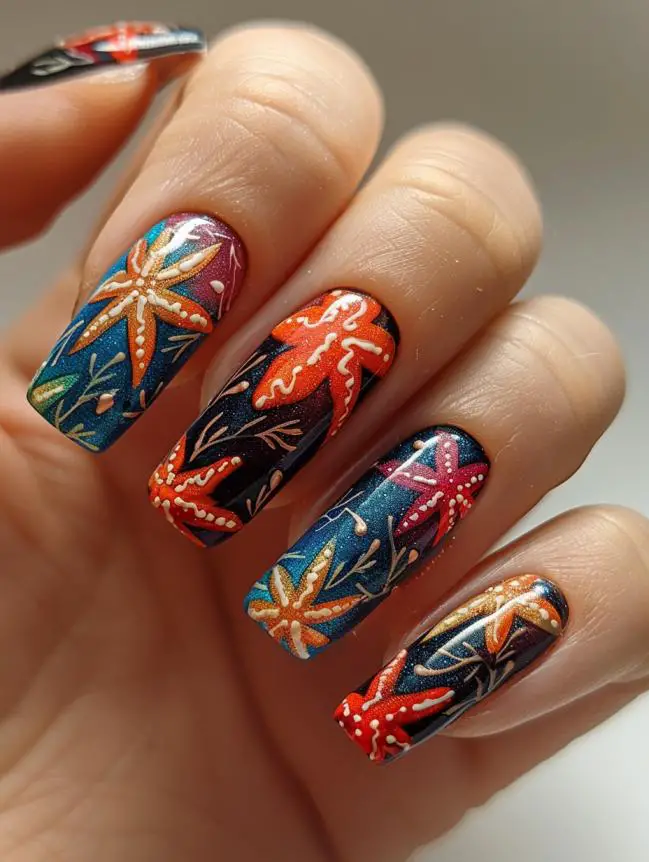
For a modern and chic look, try matte starfish designs.
Design Idea:
- Base Color: Use bold colors like navy blue, deep red, or forest green.
- Art Details: Paint starfish in contrasting matte shades or use a matte top coat over the entire design.
Pro Tip: Apply a matte top coat for a smooth, non-glossy finish. Matte designs are stylish and perfect for a subtle, sophisticated look.
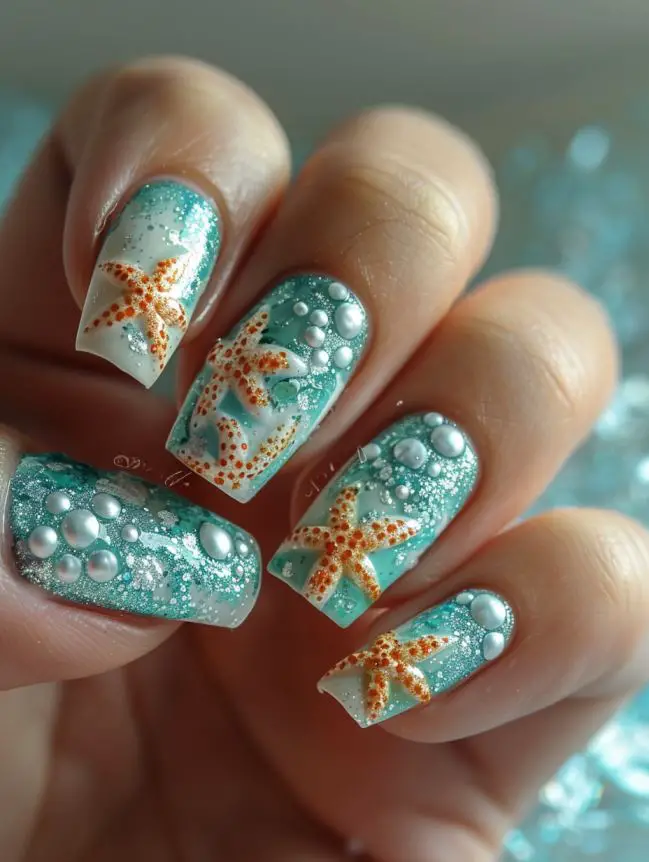
Add an underwater bubble effect to your starfish nail art for a playful and fun look.
Design Idea:
- Base Color: Light blue or turquoise to represent water.
- Art Details: Paint starfish and add small bubbles using white or clear polish.
Pro Tip: Use a dotting tool to create perfectly round bubbles. A glossy top coat will give the bubbles a realistic, watery effect.
Here’s a quick step-by-step guide to creating a simple yet beautiful starfish nail art design at home.
Materials Needed:
- Base coat
- Light blue nail polish (for the ocean base)
- White nail polish (for the starfish)
- Thin nail art brush or toothpick
- Dotting tool
- Top coat
Steps:
- Prep Your Nails: Start with clean, trimmed nails. Apply a base coat to protect your natural nails.
- Apply Base Color: Paint all your nails with light blue nail polish. Allow it to dry completely.
- Create Starfish: Using the thin nail art brush or toothpick, draw small starfish shapes on your nails with white nail polish. Start with a central dot and extend five lines outward to form the starfish arms.
- Add Details: Use the dotting tool to add small dots around the starfish or on the remaining nails for added detail.
- Seal the Design: Once everything is dry, apply a top coat to seal your design and add shine.
Pro Tip: Practice drawing starfish on a piece of paper first to get the hang of the shape. You can also use nail stickers if you’re not confident in your freehand skills.
Layering different colors and textures can add depth and complexity to your nail art. Start with a solid base color, add a gradient or glitter layer, and finish with detailed starfish designs.
Pro Tip: Allow each layer to dry completely before adding the next to avoid smudging and ensure a clean, professional finish.
Practicing your freehand skills can improve your precision and creativity. Use a nail art sketchbook to practice different starfish designs before applying them to your nails.
Pro Tip: Start with simple shapes and gradually add more details as you become more confident. Freehand designs can be unique and personalized.
Don’t be afraid to experiment with different color combinations. Starfish designs can be versatile, and using unconventional colors can make your nail art stand out.
Pro Tip: Use a color wheel to find complementary colors that work well together. Experimenting with contrasting colors can create striking and unique designs.
To ensure your beautiful starfish nail art lasts as long as possible, follow these care tips:
- Apply a Base Coat: Always start with a base coat to protect your nails and make the polish last longer.
- Seal with Top Coat: Use a top coat to seal your design and add shine. Reapply every few days to keep your nails looking fresh.
- Avoid Harsh Chemicals: Wear gloves when cleaning or doing household chores to protect your nail art.
- Moisturize: Keep your cuticles and hands moisturized with cuticle oil and hand cream to maintain healthy-looking nails.
Starfish nail art is a delightful way to bring the ocean’s charm to your nails. Whether you go for a classic beach theme, an underwater fantasy, or a minimalist design, these ideas are sure to inspire your next nail art creation. Experiment with colors, textures, and techniques to make the designs uniquely yours. Happy painting!
Stay Gorgeous, Share the Secret!
